You can find links to all my other tests/guides here.
Regard 3D has been around for a while now. I included it in my 2017 photogrammetry roundup, and version 1.0.0 was released in march 2019, but I’ve never actually run through it on my blog, so here goes.
Regard 3D uses openMVG as the backend for SFM, and CMVS/PMVS, MVE, or SMVS for dense reconstruction. Importantly, Regard3D is one of the few photogrammetry programmes with a GUI that doesn’t require an Nvidia CUDA compatible GPU.
I’ll run through once with defaults, then play with settings and see what I can get. Open the app and you’re met with the following UI. It’s functional:

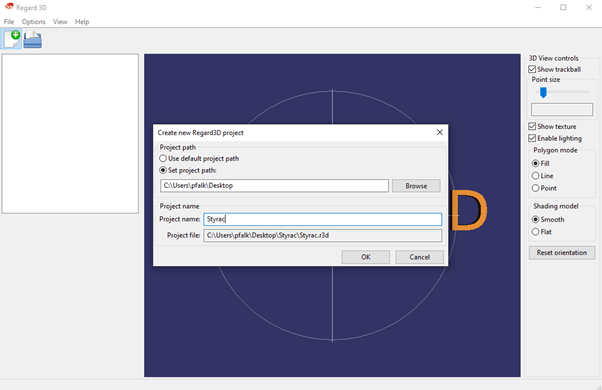
Hit the upper left most icon to create a new project. It’ll ask for a project directory, and a name. I’ve chucked it on my desktop for now.
With that done, you’re given a button to Add a picture set. Select your photos, and it’ll give you the relevant details:

Press ‘OK’ and you’ll be met with the first stage, and the option to start computing matches:

Hitting ‘Compute Matches’ brings up a sub-window of options:
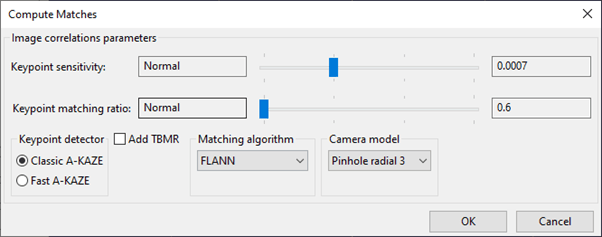
As you can see, it’s using AKAZE, rather than SIFT. I left everything on default for this guide.
Computing matches took 2 minutes 16.
You can ask it to show you matching results, and it’ll give you the appropriate visualization:

You then click on Triangulation, pick your method, and off you go. Again, I’m sticking with defaults for now.
That took 11 seconds, and calibrated 41 of the 53 images (not great):

The result is a sparse point cloud and camera positions:

And now you have the ability to click on ‘create dense pointcloud…’
Again, that opens a sub-window of options:
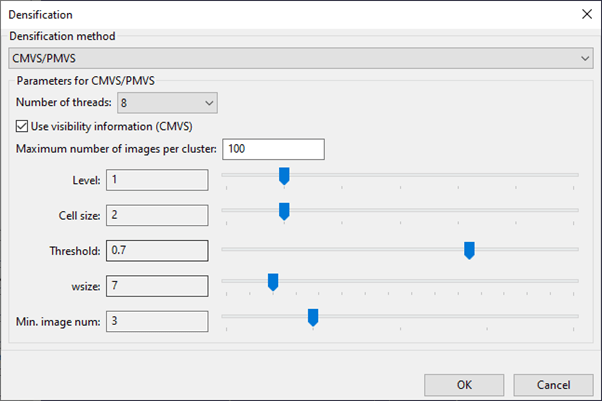
And again, I’ll stick with default settings for now, but will come back to this later, because densification method includes CMVS/PMVS as the default, but also MVE, which I’ve had great success with previously, and SMVS which I’ve had even better luck with.
When that’s done (it took 12 minutes 27 seconds here), it’ll show you your dense point cloud:

As you can see from the buttons on the left, you can create a surface, but you can also export the point cloud, or the scene directly to meshlab
You can see in the image above, the reconstruction’s not great, but let’s power on regardless (pun unintended). Again, plenty of options appear when you click Create Surface:

That took 13 seconds.

It’s a bit bumpy, and I’m showing you the good side here, but not bad. This isn’t a textured model – default settings just colour the vertices.
So, on default settings we got a so-so model, and it took a total of 907 seconds (about 15 minutes).
Here’s the model for your perusal:
Now I’m familiar with some of the other algorithms available at each stage, so I ve gone out of my way to try and make something better. Sadly, I don’t have time to do an exhaustive search and documentation of different parameters as I’ve done in the past.
Anyway, try as I might, I could not get more than 41 of the 53 cameras to match, so I ended up working from the densification stage of the process above, and running MVE and texturing. The mesh is ok, but it produced 120 8mb texture files. I had to re UV map the model and re-project the textures in Blender. Here’s the final model:
As you can see, that big gap on the rear left means there’s still a whopping great hole in the mesh that I simply couldn’t get reconstructed. Plus this took an extra 50 minutes, plus the time spent in blender re-UV mapping (ages! resulting in this twitter thread).
Summary:
It’s a really nice GUI around some well-established and high-performing algorithms. They don’t work particularly well on this dataset, and it’s not GPU accelerated, so it’s not super quick. On the flip side, lack of GPU requirements means this will run on anything with a half decent CPU and good amount of RAM. One thing I don’t like is that you can’t run a dataset from start to finish unattended – you have to be present to select settings and click ok at each stage. That made looking for the best parameters for this dataset a massive pain in the arse.

Can you leave the specs of your computer setup in an update to this? I am reconstructing a massive statue with 650 photos taken from a UAS platform, and I’m trying to draw some comparisons between my run time and your times you mentioned. I originally ran them through COLMAP, which took 177 hours to complete because it ran through the paltry integrated GPU. Regard3D completed the same photoset in 26 hours with the same photos, but is taking longer for the triangulation phase. I’m currently sitting at 2.75 hours just for triangulation.
I did notice that the GPU never went above 100% usage for COLMAP, but the CPU frequently ranged around 680% for Regard3D. I had thought something was amiss with that, until I saw that 177/26 was ~ 6.8 hours running COLMAP for every hour running Regard3D.
I’m running this on MacOS on the most recent Mac Mini (2018) with 3 GHz 6-core Intel Core i5, with 64 GB 2667 DDR4 RAM. The pitiful graphics card is the Intel UHD Graphics 630 1536 MB.
To speed things up, I’ve reprioritized the process Regard3D to -19 (high enough to take priority over most processes, but low enough to allow real-time mouse-clicks).
Hi Tim, I’m (sadly) still using the same computer I listed here: https://peterfalkingham.com/2018/10/20/hardware-i-use-simulations-photogrammetry-and-dissection/
Intel i7 (quad core), 16Gb RAM, and I’ve upgraded to an Nvidia 20160 super.
If you’re using a Mac, it means you don’t have an Nvidia card so COLMAP can’t use CUDA for the dense reconstruction. Unfortunately, your options are limited, as most photogrammetry software requires an Nvidia GPU. Regard3D is one option, Agisoft Metashape (paid) is another, or you could try OpenMVG (https://peterfalkingham.com/2018/05/22/photogrammetry-testing-12-revisiting-openmvg-with-openmvs/).
Your CPU and Ram should be more than enough for anything using CPU only.