
[edit] – I later built on this post and extended the setup considerably here.
Photogrammetry is awesome, and there’s a whole bunch of papers and software out there that mean you can do it for free. But taking 100’s of photos can be a pain. I’ve been eyeing up ways of automating this for a while now, and finally carved out a few hours to research and build an automated system that will turn a turntable and take photos automatically.
The basics.
I was spurred into action by this reddit thread. Which ultimate leads to this set of files on ThingVerse.

I used my Dremel 3D20 to print out the parts. One major problem is that the build volume of the 3D20 isn’t big enough to print the larger parts. I considered scaling them, but the issues with the gears would have made that process more difficult than I was willing to commit to.
Instead, I opened each file in Autodesk MeshMixer (free), and simply cut each piece in half, then printed the halves separately:

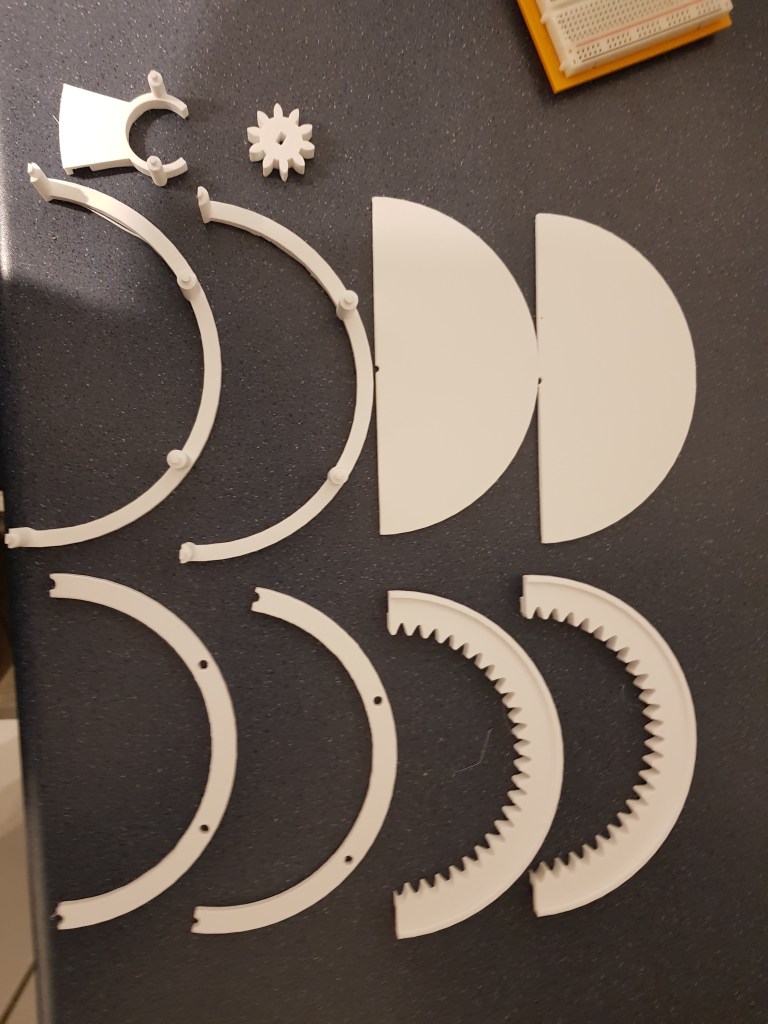


Everything just fits together without any glue. I may want to make things a bit more solid in future, but for now it’s fine just resting together.
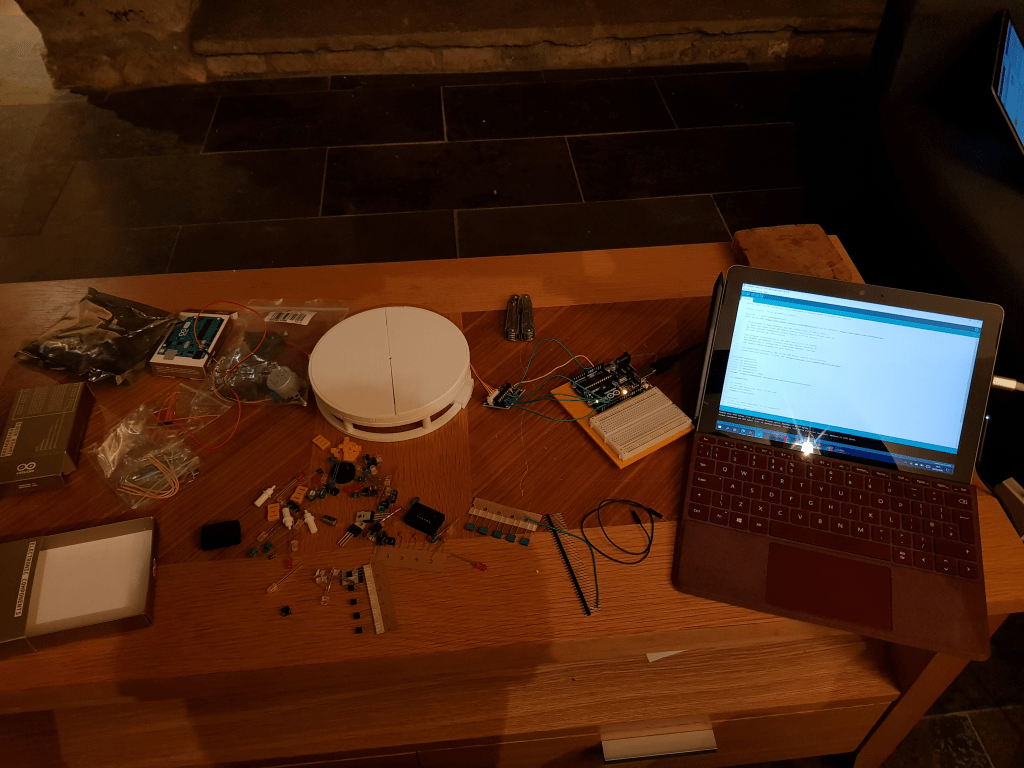
I’d previously purchase an Arduino starter kit to play around with (dreams of robot feet), but hadn’t done much with it beyond the tutorials.
To make this work, you’ll also need some stepper motors such as these. The link I’ve given you there is for a pack of 5 that also contains female-male wires. I was missing these, and for the mean time (until a pack arrives) I’ve improvised:
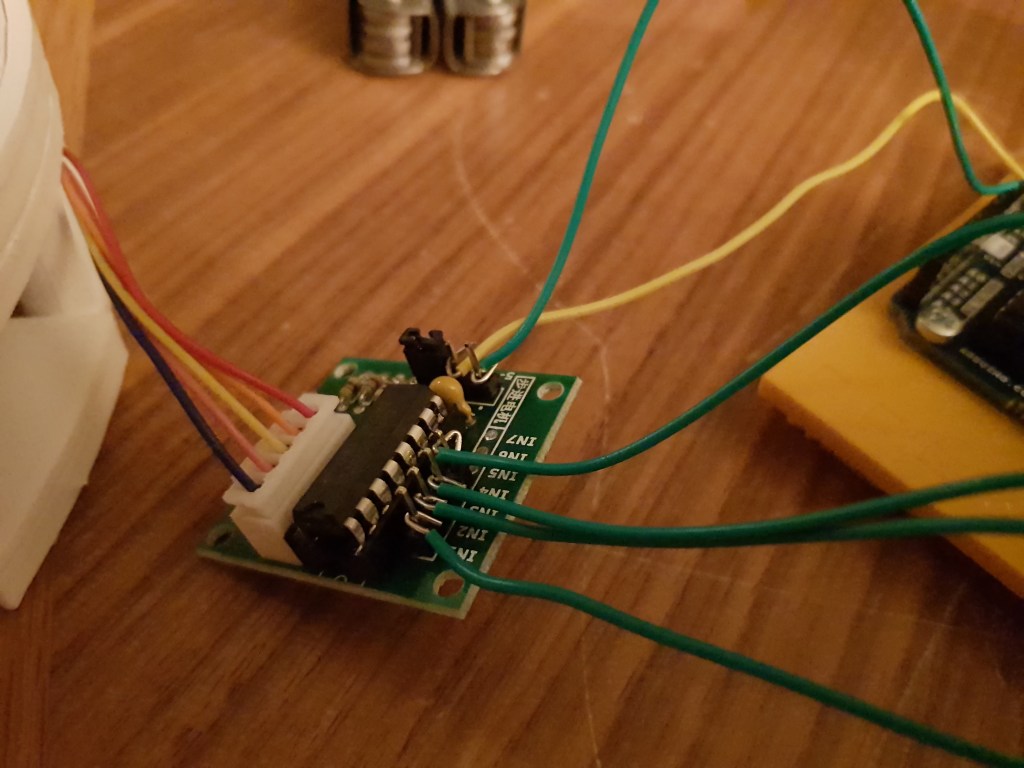
It was fairly straight forward to wire up – ports 2,3,4,5 on the arduino, to the 4 pins (IN1-IN4) on the stepper motor driver board. 5v (yellow in the above) and ground to the relevant pins.
Then upload the .ino file from thingverse to the Arduino.
Next step is more difficult – get QPython for your android phone (no idea what the process is for iPhone, sorry), and put python on a computer you’re going to hook up to the Arduino. I’m using my trusty little Surface Go.
Copy Server.py to your phone, and client.py to somewhere useful on your computer. Both phone and computer will need to be on the same wifi network.
Phone:
[Note that I’ve forked the original python code on github to make some minor quality of life changes: https://github.com/pfalkingham/AA-Scan – possibly more to come in the future.]
Launch QPython, click editor, and then open the server.py script.
You now need to put in the IP address of your phone where it says “ServerAddress=”, e.g. “serverAddress=192.168.8.100”.
At this point you can also change where the photos will be stored.
Then run the script (small ‘play’ button at the bottom of the screen). You should see a terminal that looks like this:

If it doesn’t, then something’s not right, and I can’t help I’m afraid.
Computer
In your Arduino IDE, just check which COM port the arduino is on. for me it was COM3, so in client.py I added my phone’s address to serverAdressList, and I replaced ‘dev/ttyACM0’ with ‘COM3’.
Then you just run the script with “python Client.py”.
If everything worked, you should see some movement, and your phone will start taking photos:
I used a rabbit vertebra, found in the garden to test this set-up. The vert is less than 2 cm in length. I ran it on the turntable in 4 poses (balanced on dorsal, ventral, cranial, and caudal sides), collecting a total of 720 photos, then threw all the photos in AliceVision Meshroom and processed as one lot. The result is, frankly, stunning:
This is going to be very, very useful for small objects in the future. And the best part is, it’s entirely portable.

This is very useful indeed. Yet another quality post from you.
Just a quick question: with 400+ images with at least three poses, do you have to manually align the images of different poses, or does the software do it for you?
I use an Artec EVAscan at the University, and it sometimes takes manual alignment to get good results, though usually it understands the various poses.
I was ready to manually align them (or at least semi automatically do it) but even with the imperfections of the 3d printed plate, the white of the plate and lightbox were ignored by meshroom, and it matched all 720 photos in one go, so a conplete 360 model without aligning chunks manually.
Excellent results. I must dig up my HD webcam version of this system. I toyed with it and Autodesk Recap for a while, and got good results with 40-60 images, but I am always looking for open source options.
In my limited experience with this technique it’s sometime useful to tweak the white point in the images ( or black point if you’re using a black background ). This can help merge the support plate and the light box background even better. I used an Imagemagick command to do all the images in one go rather than open each one.
Very good. All of these are very useful pointers, so thank you so mych for all your work. Here’s a link to my test with Autodesk’s 123D Catch, if you would like to see my results.
https://www.sabulo.com/sb/blender/3d-scanning-with-autodesks-123d-catch/