
I’ve tried something new and made a video tutorial:
However, personally I have little time for video tutorials, so here’s a written version:
Get your CT data:
Fairly obviously, you’ll need some CT data. I assume you have your own, but if not, you can download some from John Hutchinson’s excellent CrocBase resource – I’m using a scan of Crocodylus johnsoni from there.
Get your software:
I’m using 3D slicer to process CT data (I’m actually using the development version, but recommend the stable version, 4.8 at time of writing). 3D slicer being one of the more reliable and fully featured free CT segmentation packages I use.
Ultimaker Cura for processing 3D models into 3D Print files.
And I briefly use Meshlab to check 3d files in the video.
I also rely on this Cura plugin to communicate with my Dremel printer (this is a life saver, and means I don’t have to rely on cludgy work arounds).
Get Cracking!
First step is to load the data in. To do so, go to the ‘Data’ Icon at the top of 3D slicer, or the big ‘load data’ button when you open it up:

If you’ve got dicom files, you can use load DICOM data (surprisingly enough), but ‘load data’ will also handle jpg/tif stacks etc.
Anyway, once that’s up, navigate to your folder of CT slice images and select 1. Click ‘show options’ and then make sure ‘single file’ is not checked, otherwise only one image will be loaded, but obviously you want all of them to load so Slicer can reconstruct the volume.

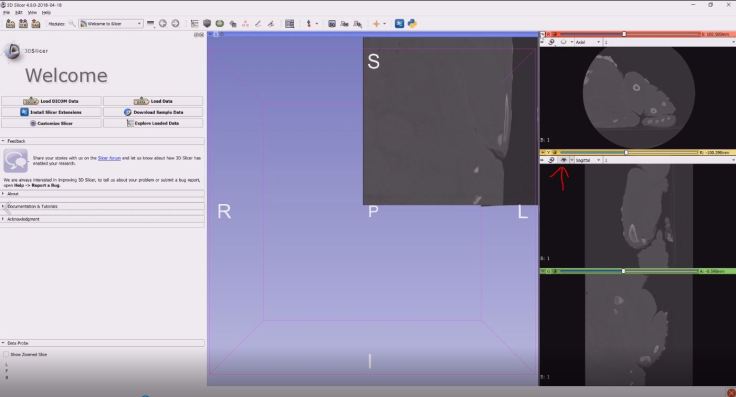
You data should now load, and you’ll see the individual slice views on the right (or bottom in normal conventional view). Left click and drag in those views to change brightness/contrast, and go to the pin icon, then the eye icon to make them visible in the 3D view:
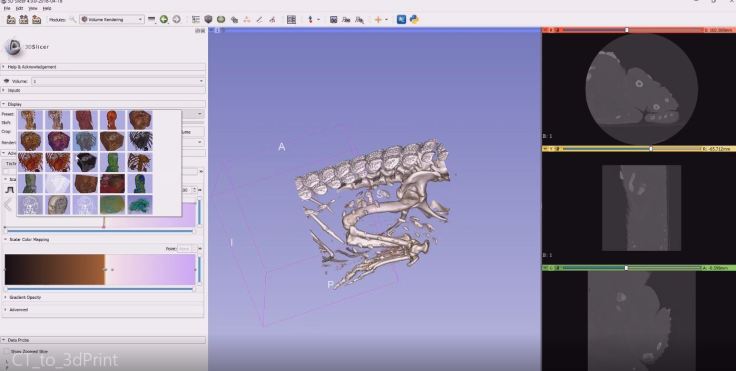
Change the module (drop down menu at the top) to ‘volume rendering’ and click the eye icon to make the volume visible. There’s a range of options under ‘preset’ to view bones/soft tissues, or you can play with the mapping manually:
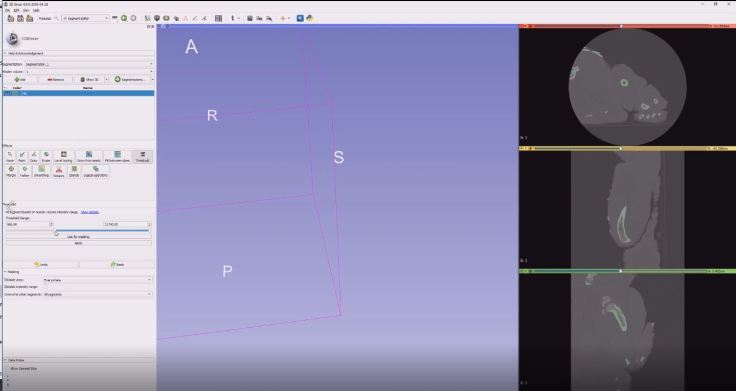
Change the module to segmentations, create a new segmentation, and then go to the segment editor. You can double click on the segment and rename it for clarity. Then we use threshold to select only the bones – drag the slider range left/right until only the bones are selected, then hit apply:
If you press ‘Show 3D’, Slicer will render the label map as a 3D object. This will currently consist of everything that falls within the range of threshold values. In this case, that means all the bones that are present in the scan.

That’s fine, but for 3D printing I’m only interested in the hip. First step in reducing this down is to use the ‘islands’ function, and use ‘keep selected island’ If I click on the pelvis in one of the 3 slice views, it’ll keep only those voxels that have been marked by the threshold, and are connected to what I click on (in this case the illium).
Sometimes, that’ll work perfectly, but in this case not quite… The sacral vertebrae are ‘touching’ the illium and so seen as connected:

You need to use your erase tool to just remove the voxels that are touching the part you want to keep, then keep the largest island again, and you’ll be left with just the connected part. In this case, I’m fine with the illium and ischium being one part, as I’m 3D printing the whole lot, but we are missing the pubis. To get this, I just did exactly the same again, but a) made sure the threshold was applied only to areas outside our previous label (i.e. not including what we’ve already segmented) and b) I clicked on the pubis when keeping islands instead.
Job done! We’ve now got 3D models of just the bits we’re interested in. Head to export, and export the models directly, or save them then use data export, and save the STL files somewhere sensible.
Preparing the 3D print
Open Ultimaker Cura, and drag your STL files in. Ideally, you’d probably only want to do 1 at a time, but I was feeling adventurous so chucked both in at the same time.

You can move them around and if necessary scale them so they fit in your print volume. As I note above, I’m 3D printing with a Dremel printer, and have installed a plugin so that Cura knows how big the print plate is, but Cura supports quite a few printers out of the box.
I check generate supports, and build plate adhesion, set the layer height/fill accordingly. This is waaaay better than the workaround I posted about a while back.
Save the file, and put it into your printer and you’re all done:
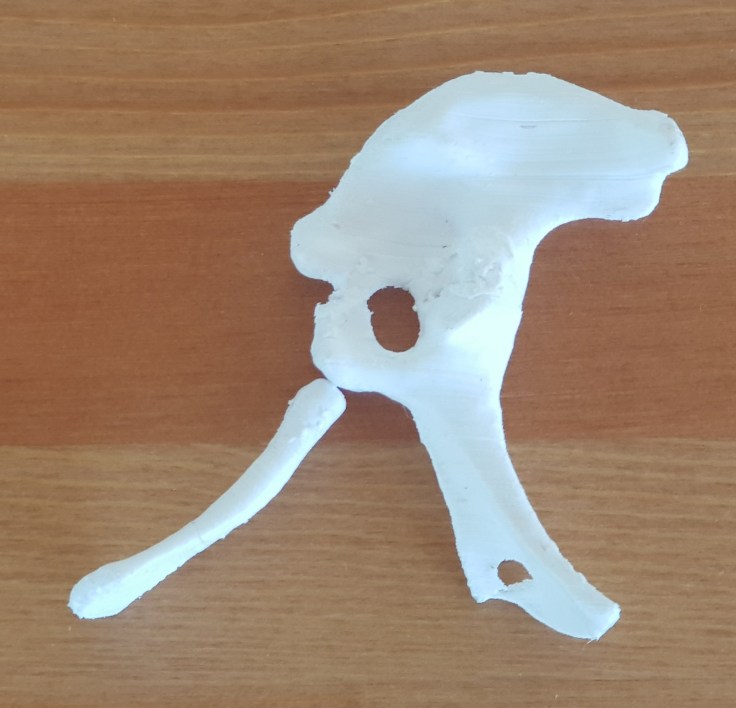
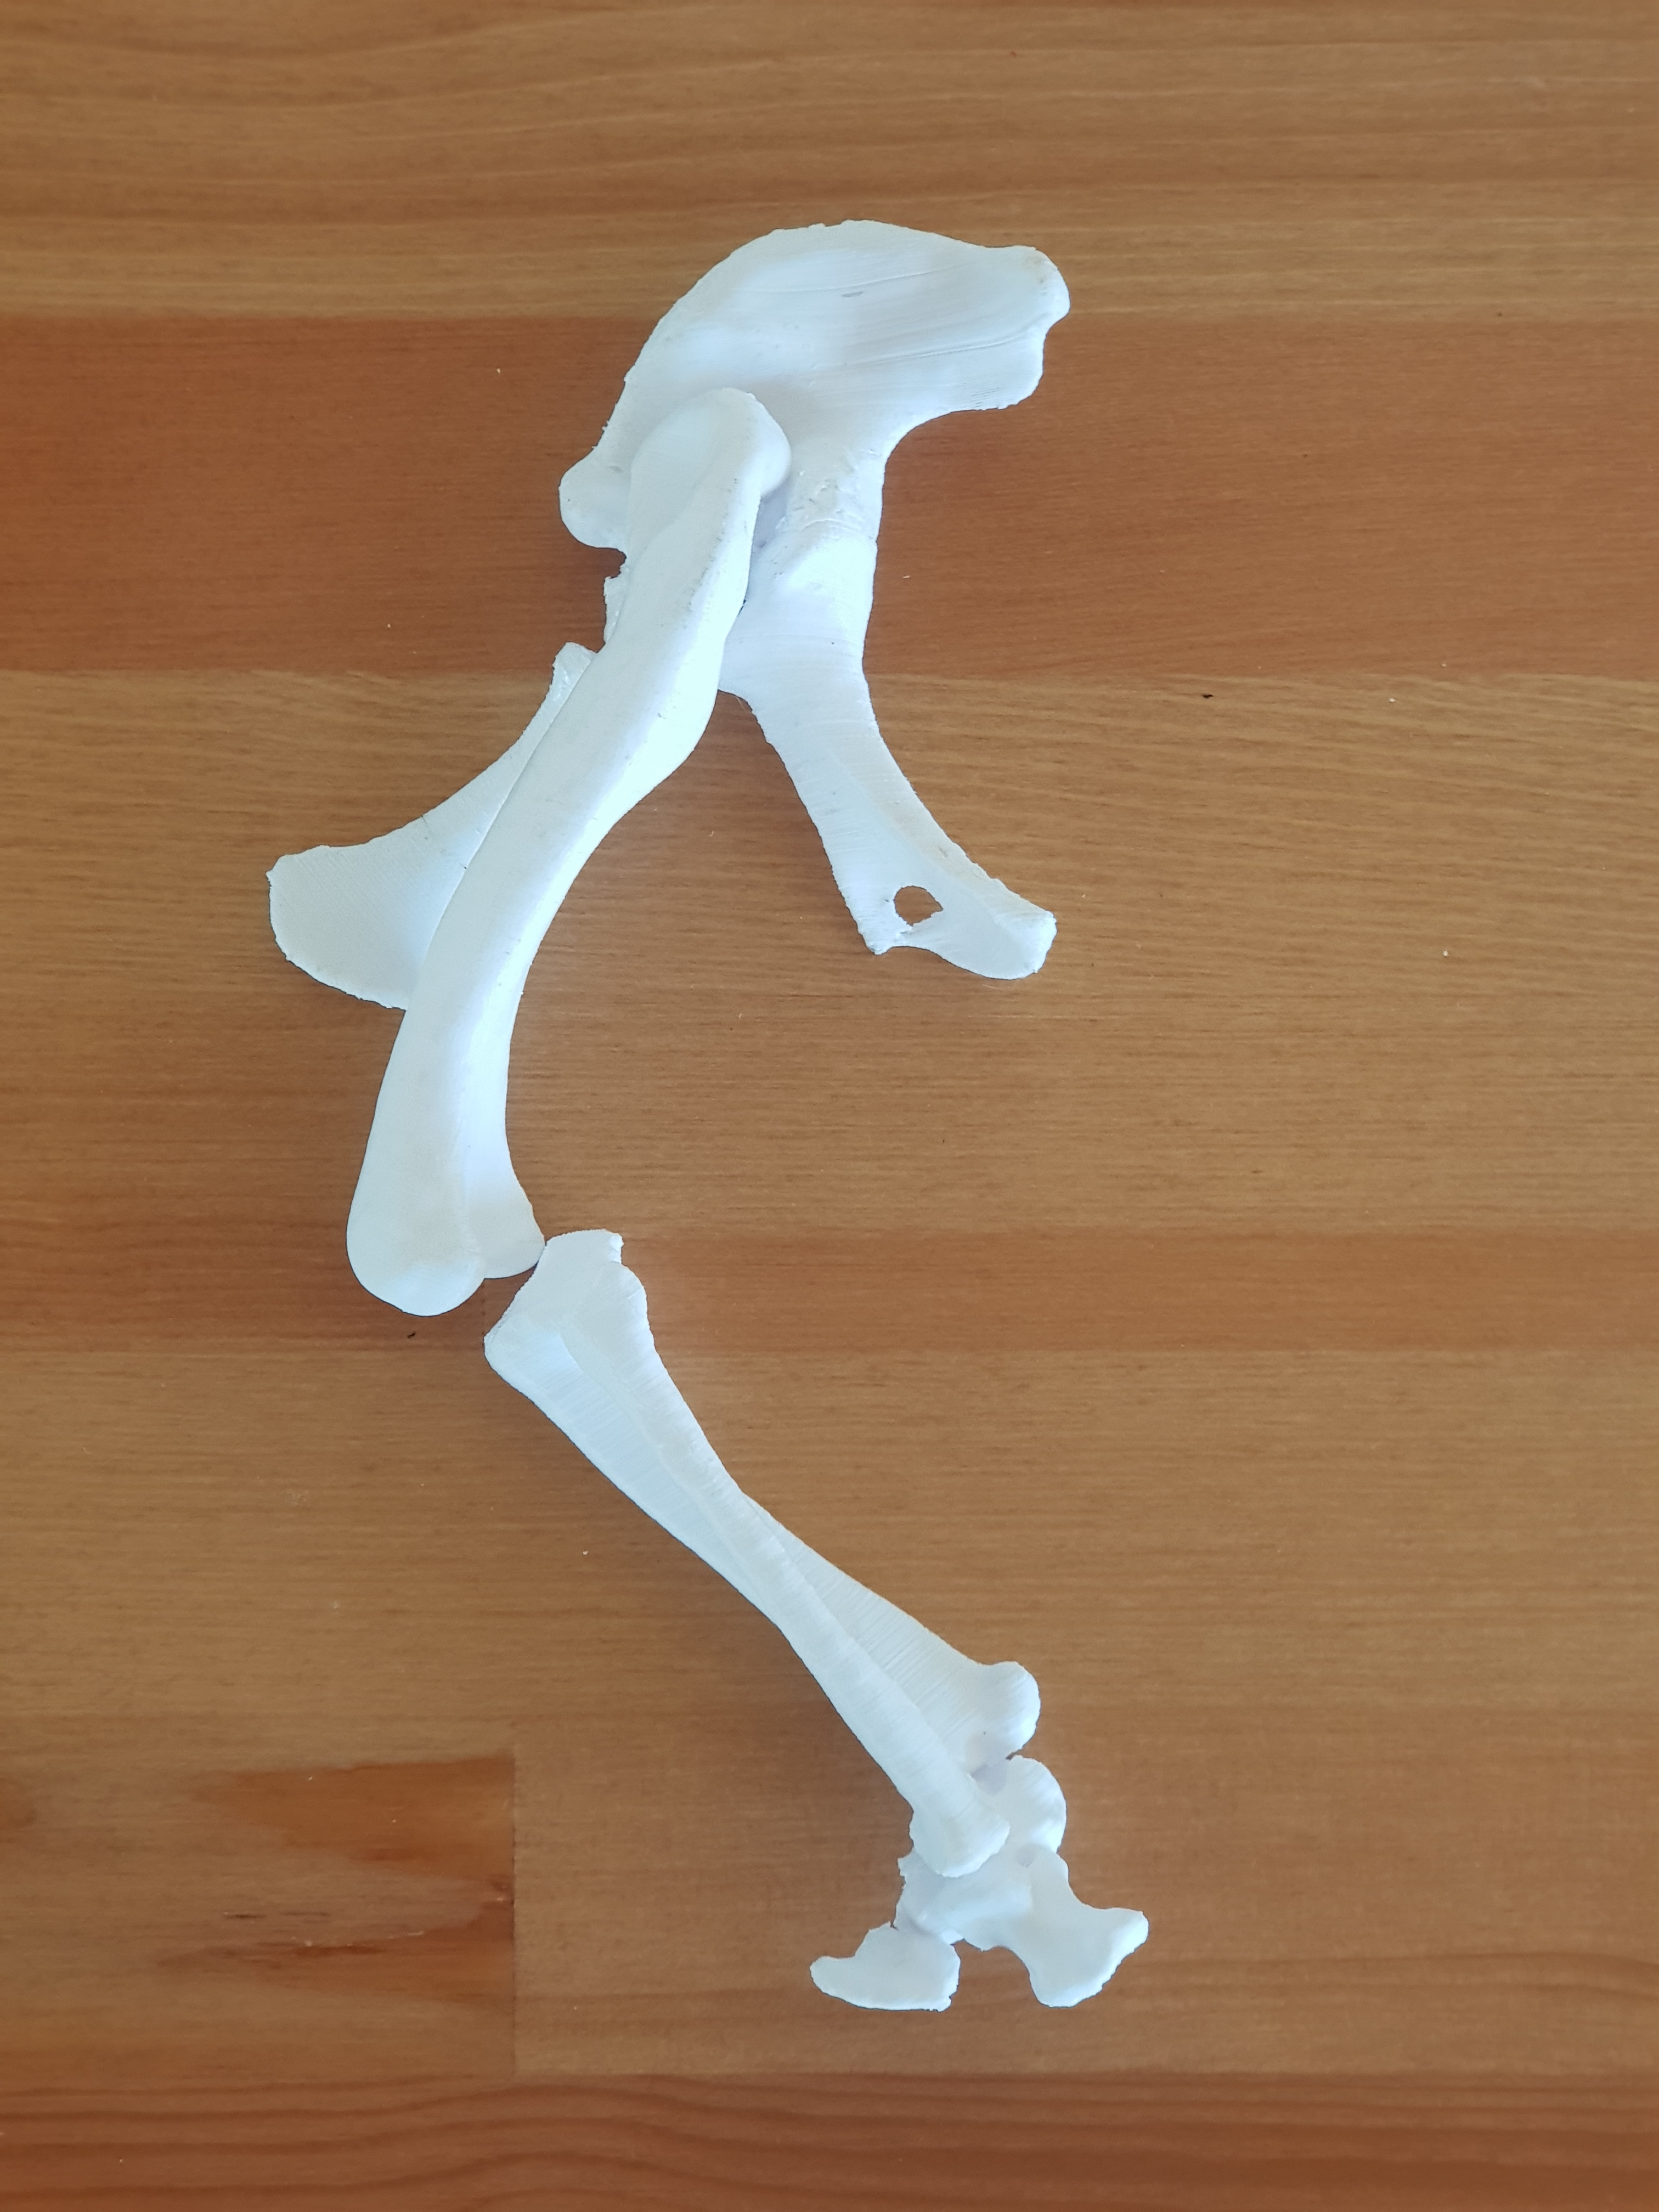
And finally, the pelvis + previously printed femur, tibia and fibula:

Is there a download (and printable) document for Slicer 4.11? It’ll be nice to have a printed copy along the side while learning Slicer on computer.
There’s some PDFs available from the training links on the 3D slicer website: https://www.slicer.org/wiki/Documentation/Nightly/Training
This one in particular is a good starting point: https://www.dropbox.com/s/9jfsyhhgude5hf1/Slicer4.8minute_SoniaPujol.pdf?dl=0%7C
But generally I think the software is so non-linear in workflow that a single PDF manual for the whole thing doesn’t work too well.
Thanks. Will read these tutorials.