
I get a lot of contacts asking what’s wrong with their software, and usually the answer is that the photos don’t have good overlap, or differing backgrounds. Sometimes I get directly asked how to take the photos, and certainly my students carrying it out for the first time need to be shown how to take appropriate photos for a 3D model, so I thought I’d put out a post on my process.
This guide will get you through the process of taking photos to capture a full 3D reconstruction, for instance a single model of a cervical vertebra, or a small skull, including top and bottom.
Equipment:
- Camera. A good DSLR is nice, but a phone camera or point and shoot can work well too.
- Scale bar/measuring tape/callipers
- Plain background (ideally white/black velvet)
- Optional: lights of some description, ideally LED, or a photobox
- Optional: tripod
- Computer with photogrammetry software (see subsequent posts).
Taking photos:
The idea is to take a series of photos that can be matched to each other. The rule of thumb is that any given point on the object needs to be in at least 3 photos. This also translates to subsequent photos having a 66% or 2/3 overlap, if moving the camera.
What this boils down to, is you need to take a whole bunch of photos that are quite similar to each other.
Now, if we want to get a full 360 degree reconstruction, we have a small issue in that part of the object is going to be resting on the ground, and not visible from any angle. To capture the whole model, we have 2 options:
- Leave the object stationary and move around it, taking many photos. Then turn it over and take a second set of photos. Create separate models from both sets of photos, then combine them.
- Use a blank background so that the photogrammetry reconstruction algorithms can’t “see” it, and rotate the object multiple times to get photos of every angle.
I used to use the first option all the time, because it made intuitive sense and meant I could put a scale bar down next to the object and use that for scaling once the models were made. Some software, like Agisoft Metashape (formerly Photoscan), have great tools for masking backgrounds and merging photosets, but quite frankly it’s often a pain in the arse. On top of that, none of the free solutions available have such tools, so it you want to stick to an opensource pipeline, we need to use 2. That’s what I’ll detail here (I’ll tackle 1 in a later post).
I’m going to assume the object is in the 5-20 cm size range, and rather than move the camera, we’ll move the object by rotating it. This will only work if the background is plain and featureless.
To get such a plain and featureless background, I’m using this photography light box, with a white background. To be honest, for white-ish bones, a black background would be better as it would hide the shadows more.
Set-up your camera on a tripod and zoom into the object so that its longest axis fills the camera frame, and any edges of the light box are out of frame, like this:
You can use autofocus, but I tend to manually focus to the centre of the object. If using manual mode, set the aperture to as high a number as you can, certainly above 10; this will maximise the depth of field (avoiding close parts and far parts looking blurry).
Also, if using a black background, decrease exposure (and vice versa for a white background). This will remove all detail from the background.
Now rotate the object just a small amount. I aim for just a few degrees. Take another photo, and so on:

Repeat until you’ve made a full 360 degrees rotation of the object. I usually end up with about 50-ish photos from one 360 degree rotation.
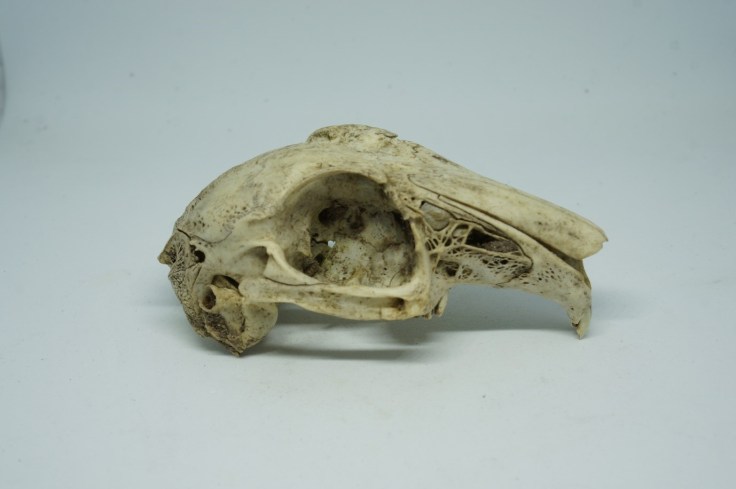
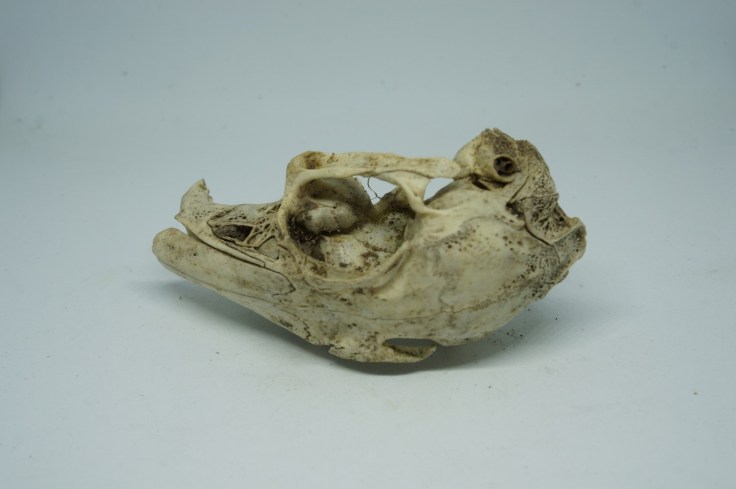
If we were to use these photos on their own, we’d be able to reconstruct part of the object, in this case the dorsal side of the skull. But we want to reconstruct even the parts the object is sitting on. So, rotate the object to another stable position, e.g. here on it’s side:
And then repeat the 360 degree rotation.
Ideally, you’ll want to do at least 3, preferably 4 revolutions of the object in different poses. For this rabbit skull, I took one set with it sat flat, one set with it upside down, and one set each with the skull resting on the orbits (eye sockets). You can see that clearly in these additional gifs which contain all 220 photos I took:

And in the 3D reconstruction:
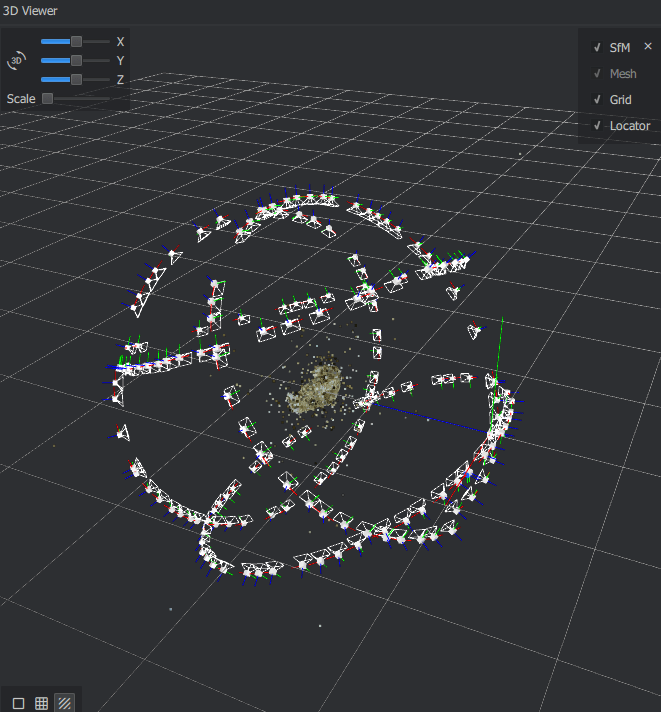
Because there are no features behind the skull, the software assumes the camera has been moving around the object, and aligns all the photos accordingly, giving you full 360 degree spherical coverage.
When you’ve taken all of your photos, but before you leave the specimen, there’s one important step before putting the specimen away. Take your callipers or ruler, and take a photo of them measuring some aspect of the object, ideally along it’s longer axes. Callipers are particularly good for this as you can get the tips right on (or next to) the object.
This one doesn’t need to be against a black background or anything, just a clear distance on the bone, between two points you’ll be able to identify and pick in the model, and scale it accordingly.
To make said model, throw all your photos into your favourite free photogrammetry software (mine’s currently AliceVision’s Meshroom).
Here’s the finished model:
Obviously, not all specimens can be moved around like this, so in a future post I’ll talk about making two models by moving around the object in two poses, and then merging the models.

Thanks for the explanation, it was a great help. AliceVision Meshroom is truly amazing. Just because you do not need masks when using the turnable method is a great plus point of the software.
Hi how are you able to get meshroom to work without a background? When I try this method it can’t find any pairs.
You need to maie sure your object fills a decent portion of the image, and that the difference between angles is pretty small.
love your post, it was super helpful. I can’t wait to read about the method you mentioned to stitch two sides together.
Right, I should write that at some point! It dropped off my radar because with my automated setup I can get whole models in one go!
I’ve now written this post Kirsten, you can find it here: https://peterfalkingham.com/2020/05/27/aligning-and-merging-two-halves-of-a-scan-cloudcompare/
Hi! Thank you for the article! For me, some ”cameras” see part of the object bigger and there are other little placement errors. But the majority of the cameras are fine. I failed to find the logic in it, and can not seem to find related issue on the forums . Any idea on this? I’m almost there!:) Thanks!
Are you able to share your photo set? It sounds like there could just be misalignment of a couple of cameras. Perhaps higher (or lower?) alignment settings would help?
Hi,
thanks for your blog posts about photogrammetry of fossils.
I tried your approach described here and it isn’t working for me. When i flip the object, meshroom is not recognizing it as bottom of the fossil, but “overwrites” the cameras from the top side images. I removed the background of all images using rembg as you described in another post. The final result is a mixed mesh with the top and bottom merged together, and a hole in the bottom of the object.
Am i missing some configuration parameters? Or could it be metadata in the images that prevents meshroom from recognizing the bottom images?
Any help would be highly appreciated.
If it’s still doing it with the background removed, then it sounds like there aren’t enough connecting photos between the two sides. How similar is the object when you turn it over (what is it)? Have you tried making two models and merging them manually. I’ve a tutorial on doing that.
Thanks for the fast reply. Top and bottom of the fossil (an ammonite) are not very similar, the bottom is allmost all covered in stone. I tried shooting adding additional photos from the side, like you described in this blog post. That helped a bit, but all in all not enough. Photos from the top are ignored by Meshroom. Thanks anyways, i will research a bit further. 🙂
hiee there thanks for putting up this great article. can you also share me the link to make 2 3d models and then merge them manually, would love to read that!
I’ve already got an article for merging models: https://peterfalkingham.com/2020/05/27/aligning-and-merging-two-halves-of-a-scan-cloudcompare/
And one for merging textures: https://peterfalkingham.com/2020/05/28/transferring-textures-from-two-halves-to-a-whole-using-blender/
Might be a little out of date now, in that there may be easier ways to do this.