
I saw recently that COLMAP had received an update to 3.7 in late Jan ’22 (I’d previously tested 3.6 a year or more ago), though after a quick, unscientific trial, I didn’t notice any particular changes to UI, workflow, speed, or quality of final model, so I didn’t think it was worth a blog post.
But then I received a message asking if I had a more up to date script for the COLMAP/OpenMVS workflow that I’ve previously rated very highly. I had a look at the OpenMVS github page, and saw that the latest release, from December 2021, has added CUDA to the dense reconstruction stage, improving both speed and accuracy. There’s also been some changes to both COLMAP and OpenMVS that mean interfacing between them needs new scripts.
There’s not a lot of room for screenshots about each, because in this workflow it’s all script based. As I say, COLMAP hasn’t seen any obvious changes to the UI or workflow, and OpenMVS is completely command-line based.
To summarise the main changes that matter to my previous workflow:
- COLMAP functions are now called via colmap.bat, not colmap.exe. This means my script now needs to aim at the bat file, and it needs to use ‘call’ in front of it each time so the script continues.
- OpenMVS has now implement CUDA. This should speed up, and improve the accuracy, of the dense reconstruction.
- OpenMVS in a previous version implemented an experimental semi-global matching
- OpenMVS also exposes the depth maps, so they are easily accessible.
Full lists of changes since I last looked at both softwares are available on their respective github pages: OpenMVS and COLMAP
So, I’ve updated my script and have it below – copy this into a text file, change the paths to COLMAP and OpenMVS, and where you want your temporary files to sit, and save with the extension “.bat”:
::Store current Directory:
set currDir=%CD%

::get folder name as variable
SET "MYDIR=%~p0"
set MYDIR1=%MYDIR:~0,-1%
for %%f in (%MYDIR1%) do set myfolder=%%~nxf

::These parameters are specific to computer
:: Set colmap directory all the way to and including the bat file.
set colDir=E:\Programs\COLMAP-3.7-windows-cuda\COLMAP-3.7-windows-cuda\colmap.bat
:: Set openMVS directory, just folder that all the exes are in.
set oMVS=E:\Programs\openmvs
:: Set Working Directory (windows) - this is where all the temp files will sit.
:: I currently create a folder on my E drive with the same name as the folder this came from.
set workDir=E:\%myfolder%\


::Make the temp folder, copy jpgs to it, and 'go' there.
mkdir %workDir%
copy *.JPG %workDir%\
cd /d %workDir%

::Run the colmap part - reconstructing camera positions + sparse point cloud
::Calls added because it's going to colmap.bat, not an exe

::extract features
call %colDir% feature_extractor --database_path database.db --image_path .

::match features
call %colDir% exhaustive_matcher --database_path database.db

::make a directory for the sparse reconstruction to go in.  this will be a sub-folder in working directory
mkdir sparse

::mapper - create depth maps?
call %colDir% mapper --database_path %workDir%\database.db --image_path . --output_path %workDir%\sparse

::undistort images - necessary for openMVS colmap interface
call %colDir% image_undistorter --image_path . --input_path .\sparse\0\ --output_path myundist

::OpenMVS part - densification, meshing, and texturing.
::NEW - OpenMVS now interfaces directly with the colmap folders, rather than having to go through nvm format
%oMVS%\InterfaceColmap.exe -i %workDir%\myundist -o proj.mvs

::move the shell into the colmap project folders.
cd myundist

::Create a dense point cloud
%oMVS%\DensifyPointCloud.exe proj.mvs

::Reconstruct the mesh
%oMVS%\ReconstructMesh.exe proj_dense.mvs

::optional - get rid of the following line if you don't want to refine the mesh.  Or change the parameters if you want to decimate the mesh more/less
::if you do get rid of it, make sure texturing points to proj_dense_mesh.mvs instead.
%oMVS%\RefineMesh.exe --resolution-level 1 proj_dense_mesh.mvs

::Texture that mesh!
%oMVS%\TextureMesh.exe --export-type obj -o %myfolder%.obj proj_dense_mesh_refine.mvs

::If you want to keep the intermediate steps (perhaps for timing purposes, or bug-checking), then comment out/delete the rest of the script.
::These lines move the model (obj, jpg, mtl) back to the original folder the images were in
mkdir %currDir%\model\
copy *.obj %currDir%\model\
copy *.mtl %currDir%\model\
copy *Kd.jpg %currDir%\model\

::Return to original directory, delete working directory.  You only really need these if you're batch processing multiple directories.
::cd %currDir%
::rmdir /S /Q %workDir%
So, how’s the new versions of these programs running? Glad you asked, as I spent my saturday afternoon running and tweaking to get the following, based on my Styracosaurus model photoset:
| COLMAP (sparse reconstruction/camera alignment | 1 minute 28 seconds |
| OpenMVS interface with COLMAP | 0.5 seconds |
| OpenMVS densification | 5 minutes |
| OpenMVS Mesh reconstruction | 5 minutes 53 seconds |
| OpenMVS Mesh refinement | 19 minutes 18 seconds |
| OpenMVS Texturing | 2 minutes 9 seconds |
Unfortunately, I can’t find detailed timings of previous versions, but that probably doesn’t matter given I’ve upgraded since then, from a GTX 970 to a RTX 2060 Super. However, upto Mesh Refinement is clearly decently fast. The total time for my script from start to finish (including copying files back and forth) was 35 minutes. Disappointingly, that’s longer than I’ve got listed on my roundup, which came out at 31 minutes. I’m not sure what I’m doing differently/wrong, but I wonder now if I didn’t do the refinement last time. I’m also still seeing the issues with texturing that have always been there; namely that by deault the packing of the texture is pretty terrible:
I tried playing with the texturing settings, reducing speed in favour of better packing, and it really wasn’t much better (but took several times longer:

I’ve since tried playing with settings generally, including enabling CUDA for the refinement step (which very rapidly ran out of GPU memory on my 8gb card unless I scaled down images twice), and removing the refinement step all together. Below is a couple of images of the best I’ve been able to produce so far (model is too large for sketchfab right now, but will upload at some point):

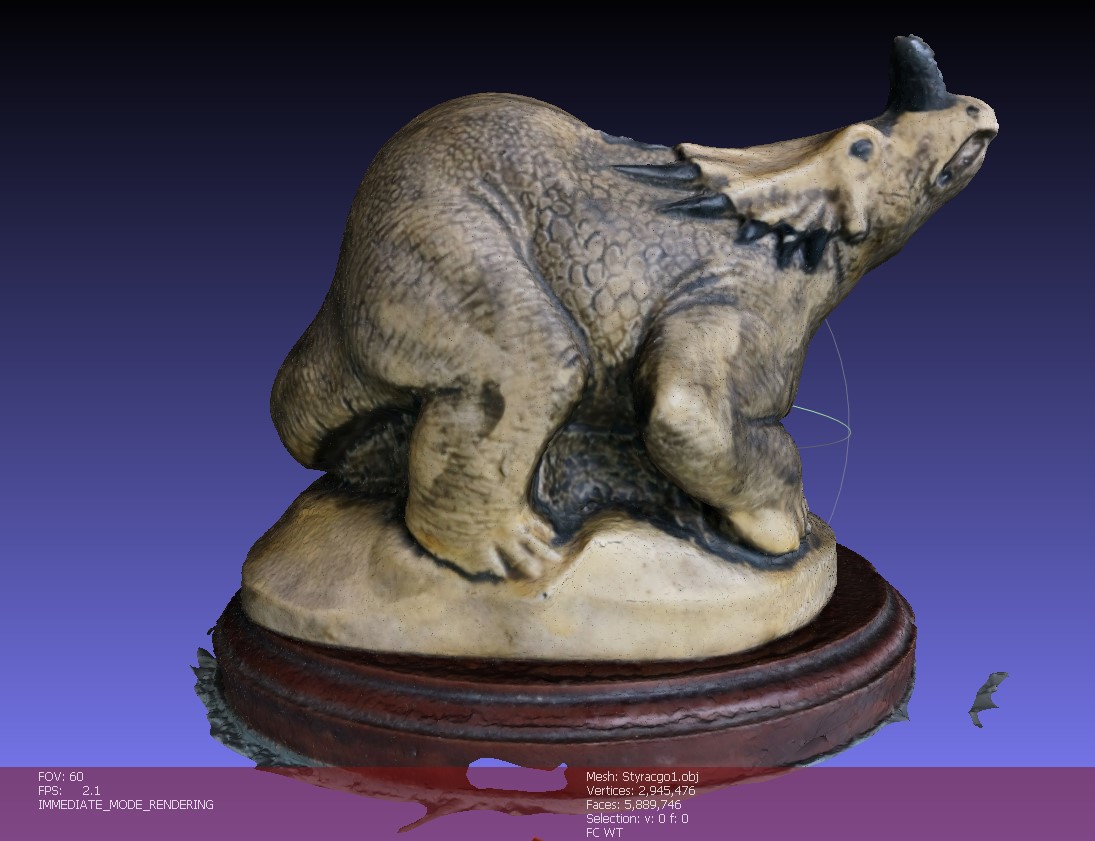
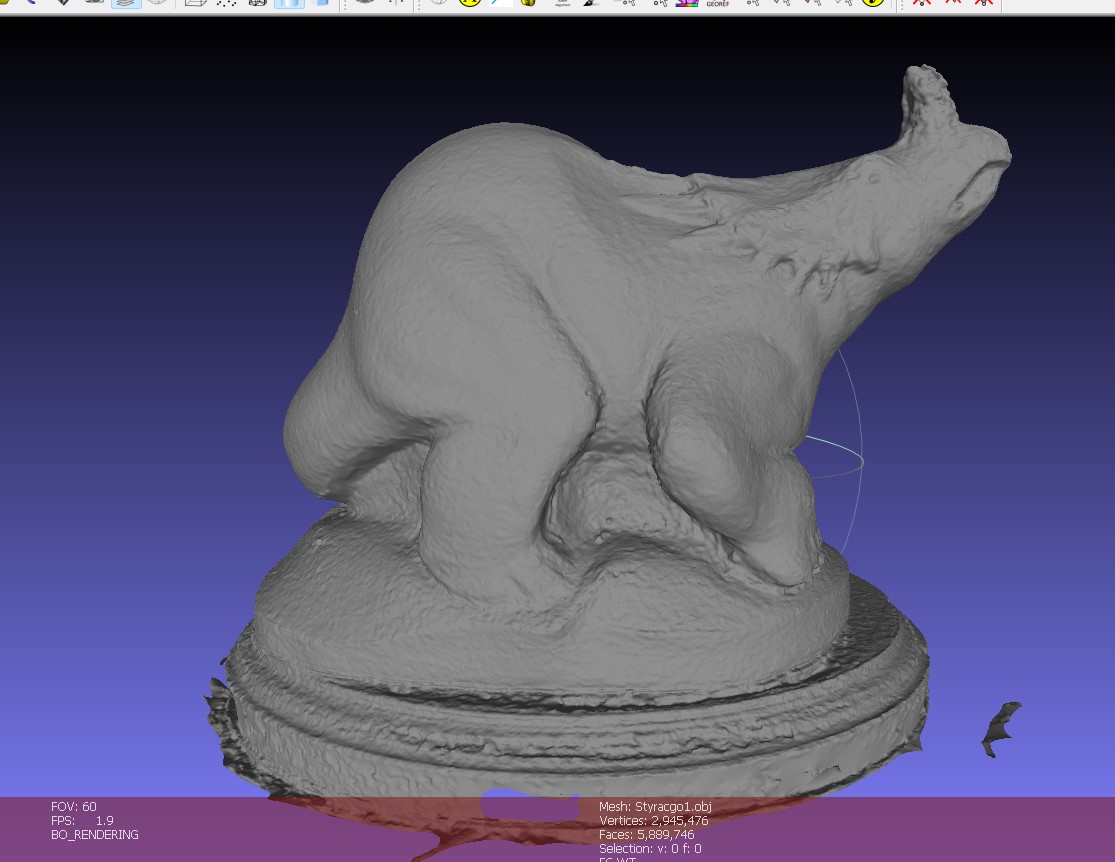
It’s really annoying that this isn’t even as good as when I used the same software in 2016.
Conclusions:
I don’t know if I’m doing something wrong, different to what I did a few years ago, or if the newer algorithms in OpenMVS (and COLMAP?) are not playing nice with my less than optimal photoset. Given that openMVS is now accelerated by CUDA, when it wasn’t before, I must be doing something different, because it’s still taking almost exactly the same time, if not longer, and it’s not making as good a model.
It’s reasonably quick as far as the free/open source photogrammetry options go, and it’s easy to automate through scripting, but the biggest issue, and the reason I originally moved entirely to Meshroom, is still present: that the texturing from openMVS is terrible – it’s ineffeicient, and there’s very little control on the size of the resulting texture.
I started my photogrammetry testing in September of 2016, which feels like a million years ago. I know I was busy then, having started my senior lecturer position the year earlier, organizing SVPCA, and writing a new undergrad course from scratch, so I’ve no idea how I did all that stuff then. Fact is, today I need a piece of software that I can drag some images onto, press go, and come back to a good model that’s optimized in mesh and texture. As far as free software goes, that’s just Meshroom, which also has a fork that works on machines without an Nvidia card now. And for paid software, Metashape does everything Meshroom does only slightly better and much, much quicker. They can both do batch processing too.
I’ll keep poking with this COLMAP/openMVS setup for a couple of days, because I think there’s a lot of power there, but it’s just not efficient or easy. I imagine some people will swear by it, so I’m intrigued to see in the comments what people’s thoughts are.

Interesting thank you. I learnt about Meshroom from this very site and have now switched to using it exclusively. From my perspective if a process is going to take more than a couple of minutes to complete then it doesn’t really matter if it’s 30 minutes or a few hours, I’m just going to let it run and go and do something else. Then the ease of use becomes much more important and Meshroom is really easy to use and works well with the default settings.
Agree 100%. Once it’s above a threshold of time, small differences don’t matter. I’ve also gone to Meshroom over COLMAP, because it’s more complete and goes to texture. However, I am using Metashape and Reality Capture more these days, because they are an order of magnitude quicker than Meshroom – 10-15 minutes instead of hour+ for the same dataset. I fear open source software is getting left in the dust at the minute (perhaps unsurprisingly)
Thanks for your update (I’m that “message writer” btw). After a few hundred tests with this setup (thanks to your script you sent me) I strongly disagree: Meshroom is not just way slower but for most cases not nearly as good as Colmap + OpenMVS. Exceptions are when I try to create big rooms and such. But for everything else: this one. Quality difference are mostly medium, sometimes even huge.
Don’t get me wrong. I like Meshroom for what it is and I regularly use it (also ReCap). And the point about the texture packing: given. Now if you know 3D, like Blender, it’s easy to create a clean texture pack in 3-4 steps – still faster than Meshroom overall. At the end I think you’re right: It’s a matter of taste. I need the best possible meshes (and textures).
Btw in case you see this: Have you worked with Lidar or ARCore, live 3D scanning, in the past? I try to get into it, but without an iPhone it seems nearly impossible.
Thanks for the comment. I feel Meshroom has been getting slower and worse over the last couple of releases, I’ve almost stopped using it entirely these days in favour of Metashape or Reality Capture, so I see where you’re coming from.
I used LiDAR during my PhD about 10 years ago (e.g. http://citeseerx.ist.psu.edu/viewdoc/download?doi=10.1.1.440.6013&rep=rep1&type=pdf). Haven’t used it recently though. Just can’t justify the cost when photogrammetry is so much cheaper and versatile. ARCore intrigues, but like you, no iPhone or apple devices means its out of reach for now.
I forgot to respond to your issue with CUDA: It definitely works and speeds up the densify process by at least 4-6 times. Maybe you forgot to activate it or define the correct device? It technically works, but there has been lots of complaints about constant crashes (which is the case for me too). On github you can find hotfixes, even though they’re for the Visual Studio build. I don’t know how to implement these, but maybe it helps you.
Hello, I tried this pipeline and I got erros that assertion “viewRef.image.size()== view.depth Map.size()” is violated. Have you encountered this issue ? I appreciate if you could handle it. Thank you.
hmmm… it’s a while since I’ve used this workflow. I don’t remember that error, is it Colmap or OpenMVS that’s spitting it? It looks like your image size and the depth maps made by colmap aren’t the same. Which could mean maybe the depthmaps haven’t been properly generated? Or that it’s not finding the original JPEGs used.
I’ve cleaned the working directory before running the .bat script. I searched this error on OpenMVS github repo, and someone said that he solved it by setting “-DCMAKE_BUILD_TYPE=Release”, but it does not work for me.
BTW I changed your script a little: by running your original script at line 44, it will create a pro.mvs in %workDir% , then line 47 you move the shell into %workDir% myundist folder, then at line 50 and 53, it seems that the pro.mvs should be changed to ..pro.mvs, because the shell is at %workDir% myundist, and pro.mvs is at %workDir%. I am not sure if this change is correct.
Oh, the above post seems ignored the back slash that identifies the folder location: %workDir% myundist should be %workDir% + backslash + myundist, and ..myundist should be ..+backslash+myundist