OpenMVG is a pipeline for structure from motion. I’ll go through the basics of downloading, installing, and running it on Windows 10.
It does actually compile on Windows, but it can be a royal pain in the rear to get everything set up properly (requiring Visual Studio, Python, and a lot of luck). Far easier to do in Linux. But who wants to install a whole new OS just to run some photogrammetry software? Well, fear not, because just the other day I posted on how to get a Bash terminal in windows, allowing you to natively run linux programs without having to install a whole new OS, virtual Machine, or Cygwin.
So, let’s start….
Downloading and building.
All I’m going to do here is run through the official Build Instructions, wording it a little differently. I highly recommend you go there for details. I’m only writing it up here so that all the information needed for a later post is in one place.
Prerequisites:
Install the required tools cmake, Git, and a c++ compiler by typing the following into Bash:
sudo apt-get install cmake git gcc make g++ python
(enter your password if you previously set one up)

- Cmake is used to create a Makefile in order to compile the source code
- Make Will turn the source code files into executables (things that actually run)
- Git Is the program that lets you download all the source code from github
- GCC Is the Gnu C Compiler (and g++ is the Gnu C++ Compiler).
- Python Is required to run the ready-to-use openMVG scripts
Now you’ll need some additional libraries, so type into bash:
sudo apt-get install libpng-dev libjpeg-dev libtiff-dev libxxf86vm1 libxxf86vm-dev libxi-dev libxrandr-dev
Downloading
Now we’re going to download the repository:
git clone --recursive https://github.com/openMVG/openMVG.git
Move into that new directory:
cd openMVG
(cd stands for ‘change directory’)
ls
This should list the files in that directory (AUTHORS BUILD docs logo README src …)
cd ..
(this goes back up one directory)
Building/Compiling
Now we create a new directory to put the compiled code in (to keep it separate from the source)
mkdir openMVG_Build
Then go into that directory:
cd openMVG_Build
And run cmake:
cmake -DCMAKE_BUILD_TYPE=RELEASE -DOpenMVG_BUILD_TESTS=ON -DOpenMVG_BUILD_EXAMPLES=ON . ../openMVG/src/
Now we’ve created the necessary configuration files to make the binaries, we just run:
make
Running OpenMVG
Ok, hopefully that’s built without errors.
If so, let’s test it out. (If not, I leave the troubleshooting to you!)
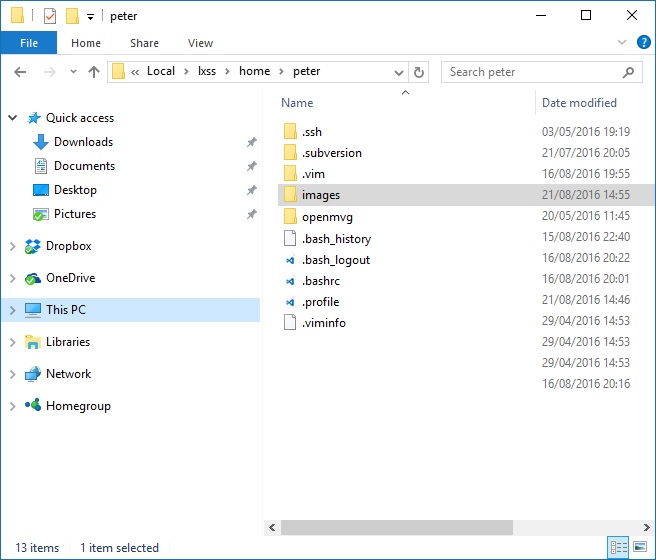
One thing to note before we go any further: the home directory for bash, is located in windows space at
C:\Users\<yourUserName>\AppData\Local\lxss\home
Navigate there in Windows explorer, and you’ll see a folder with your username. Go inside there and you’ll see folders called openMVG and openMVG_Build.
Full instructions are available on the OpenMVG docs page, including how to download tutorial data: http://openmvg.readthedocs.io/en/latest/software/SfM/SfM/
There are two pipelines – sequential and global. I’ll let you read up on what the difference is. Both are invoked more-or-less the same way, and I’ve generally found Sequential to be a little more robust.
(I’m going to assume now that your username is ‘Peter’ and that [using windows explorer] you’ve put all your images in a folder called ‘images’ in your linux home directory (next to openMVG and openMVGBuild). You will want to slightly alter the commands accordingly.)
To run the sequential pipeline on your images in your home directory, and output the results into a new folder called ‘MVGOutput’ in your home directory, type the following (capitalization matters in linux):
python /home/Peter/openMVG_Build/software/SfM/SfM_SequentialPipeline.py /home/Peter/images /home/Peter/MVGOutput
That’s it. Let it run, and inside MVGOutput, you’ll find several PLY files of the camera positions and a sparse point cloud.
You’ll need another package to make a dense cloud and subsequent mesh, and I’ll detail those later.

Hi, I followed the build instructions in the github repository. Then I tried to execute the SequentialPipeline but I get this error:
teovo_000@TeoNotebook MINGW64 ~/Documents/OpenMVG/build/software/SfM
$ python SfM_SequentialPipeline.py C:\Users\teovo_000\Desktop\Mu3D\dig C:\Users\teovo_000\Desktop\Mu3D\dig\result
Using input dir : C:Usersteovo_000DesktopMu3Ddig
output_dir : C:Usersteovo_000DesktopMu3Ddigresult
1. Intrinsics analysis
Traceback (most recent call last):
File “SfM_SequentialPipeline.py”, line 50, in
pIntrisics = subprocess.Popen( [os.path.join(OPENMVG_SFM_BIN, “openMVG_main_SfMInit_ImageListing”), “-i”, input_dir, “-o”, matches_dir, “-d”, camera_file_params])
File “C:\Users\teovo_000\AppData\Local\Programs\Python\Python36\lib\subprocess.py”, line 707, in __init__
restore_signals, start_new_session)
File “C:\Users\teovo_000\AppData\Local\Programs\Python\Python36\lib\subprocess.py”, line 992, in _execute_child
startupinfo)
FileNotFoundError: [WinError 2] El sistema no puede encontrar el archivo especificado
Any thoughts? I read in stackoverflow that is something related to how Python works (I’m not a Python programmer). Then added “shell=true” at the end of the lines in the SequentialPipeline file but I get a different error:
teovo_000@TeoNotebook MINGW64 ~/Documents/OpenMVG/build/software/SfM
$ python SfM_SequentialPipeline.py C:\Users\teovo_000\Desktop\Mu3D\dig C:\Users\teovo_000\Desktop\Mu3D\dig\result
El sistema no puede encontrar la ruta especificada.
El sistema no puede encontrar la ruta especificada.
El sistema no puede encontrar la ruta especificada.
El sistema no puede encontrar la ruta especificada.
El sistema no puede encontrar la ruta especificada.
El sistema no puede encontrar la ruta especificada.
El sistema no puede encontrar la ruta especificada.
Using input dir : C:Usersteovo_000DesktopMu3Ddig
output_dir : C:Usersteovo_000DesktopMu3Ddigresult
1. Intrinsics analysis
2. Compute features
3. Compute matches
4. Do Sequential/Incremental reconstruction
5. Colorize Structure
6. Structure from Known Poses (robust triangulation)
Looks like issues with your python install. May be much easier to use bash on windows, rather than mingw. Perhaps I’ll put together a script in the next few days to automatically download and compile openMVG.
Thanks for the reply. I reinstalled python, this time the version 2, but didn’t work either. Now I’m running the library on Linux, and it works like a champ (https://pfalkingham.wordpress.com/2016/10/09/photogrammetry-testing-4-openmvg-and-mvs-texrecon/).
So thank you for putting all these courses together, I will give you some feedback if you want! 🙂
So, I tried the setup from the link above, openMVG + MVE. I see that the results aren’t great but is very quick compared to VisualSFM + CMPMVS.
Maybe you need a little bit of context haha. I recently made a SFM course for Museums. The pipeline was VisualSFM + CMPMVS + MeshLab and the results where GREAT (the objective was the digitization of museum objects, so the results make sense). But the disadvantage was that CMPMVS needs CUDA to run and I don’t have an Nvidia card (nor AMD).
That’s why I’m picking your brain in this website hahaha. Sorry for that.
Once I found a pipeline for that objective (digitization of museum objects) I will let you know. Also, if you want, I can provide you with the manual of VisualSFM + CMPMVS + MeshLab that they gave to me (it’s in spanish)
Thanks – yeah I’ve found CMPMVS to be excellent, but super slow even with a strong NVidia card. My current workflow is COLMAP and openMVS, and I’ll put up a simple script in the next day or two.
Thank you for the great tutorial. I have built it all and everything build correctly. however when I run the last step
python /home/farah/openMVG_Build/software/SfM/SfM_SequentialPipeline.py /home/farah/images /farah/Peter/MVGOutput
I have
SfMInit_ImageListing report:
listed #File(s): 0
usable #Files(s) listed in sfm_data: 0
usable #Intrinsic(s) listed in sfm_data: 0
so everything under get computed and has 0 value
I think the problem is that it is not able to read the .JPG files inside the images folder
Can you help me with how the image files need to added to the directory and their extension?
Yeah, it’s not seeing your Jpg files. I see a ‘Peter’ in your command – that probably shouldn’t be there?
yeah I mistyped that
python /home/farah/openMVG_Build/software/SfM/SfM_SequentialPipeline.py /home/farah/images /home/farah/MVGOutput
but still there is the same problem.
How do I make sure that my system can read .JPG files and/or is the problem with how I copy the images in the folder I have manually copied the images in the folder without using a command
Maybe try copying from within bash – on older versions of windows, copying manually with windows explorer into the Linux subsystem folders doesn’t work very well (this is fixed in the upcoming fall creator’s update).
Alternatively, point directly to the image folder, e.g. /mnt/D/myimages (if photos are in ‘myimages’ on your D drive.
Thank you, I have set this right and it reads all images I provide in the folder. However the next problem when I run it is that any images I run whether they are my images or the ones you have have in your database I get this problem
e.g image model ” NEX-6″ doesn’t exist in the database
I check the text file sensor_width_camera_database.txt and I find the model name Sony Alpha NEX-6 so I tried vim editing the file and ran the code again now it doesn’t type the previous error but doesn’t take this change into account. Any idea why that happens?
This tutorial helped me a lot I got very much closer to compiling here than on windows itself however this last step seems to be present a problem with my configuration.