
I’ve had multiple emails now from different people working at US government agencies – Agisoft Metashape is no longer available nor allowed because it’s made by a Russian company. Below, I’ll provide a run through of Reality Capture as it stands today.
The main competitor to Metashape is Reality Capture, now owned by Epic Games. The good news is that it’s now free if you earn less than $1,000,000 a year, which should be most individual palaeontologists. The downside is you now need to install Epic Games Launcher in order to install Reality Capture, which a) isn’t great because the Epic Games Launcher is a laggy mess, and b) requires convincing your IT admins that you really do need to install a game launcher on your big expensive workstation (you may be able to get the offline installer via the developer pages, but I’ve been unsuccessful here).
I’ve preferred Reality Capture over all the other options for some time now. I find it’s relatively easy to use, despite an initially overwhelming UI. More importantly, it has a boat load of features either not present in other software, or present but locked behind higher tier ‘pro’ pricing. E.g. scaling a model by clicking on points in photos requires the Pro version of Metashape, but is freely available in Reality Capture.
Not too much has changed since I did a quick run through of the whole Reality Capture Process, but I’ll do the quick run-down again here, and I’ll focus on a couple of more specific aspects.
- The basics – photo to model
- Settings and layout
- Running the process manually
- Scaling your model
- Manually smoothing, filtering, cropping, and decimating
- Making an orthophoto or ortho projection
- Closing remarks
The Basics – Photos to model
Reality capture is super straightforward in this regard. Drag your folder of photos onto the application window, then press ‘start’:
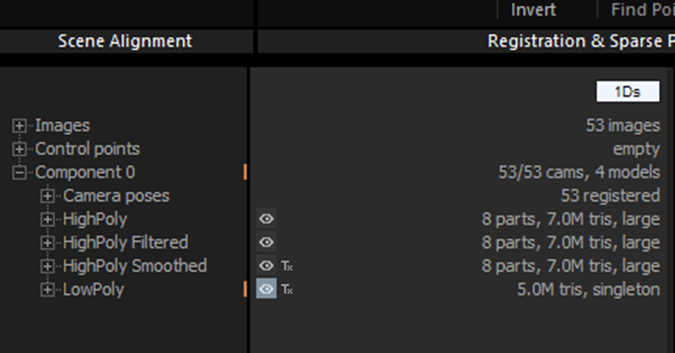
That’s it! With default settings, it’ll take a little while and actually produce 3 models at different polygon counts, but we’ll get to changing that later:
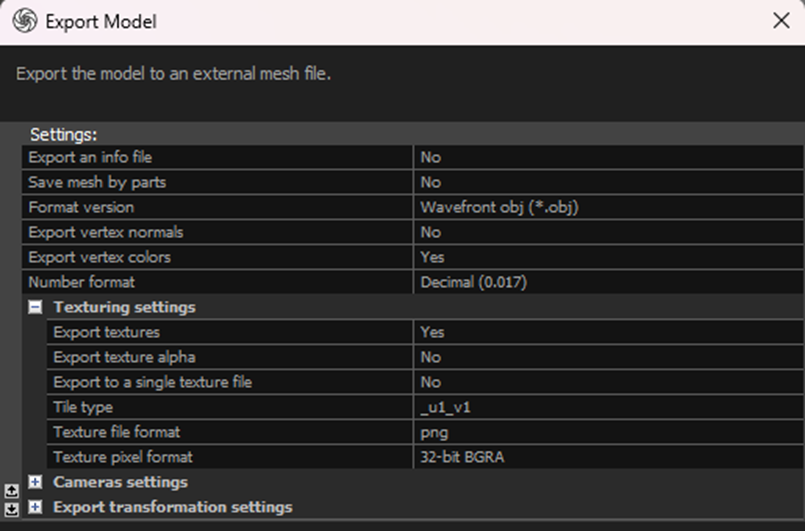
For now, just go to the menu button (the Reality capture logo) in the top left, go to export, and then pick your options:

Make sure if exporting to obj, you check that you want the texture too:
Settings and layout
I find the settings in Reality capture a bit tricky, to be honest, because they all appear in tiny view in the lower left, and it’s not always clear which settings menu is open or not.
If you go to the workflow tab, there’s a layout button toward the right:
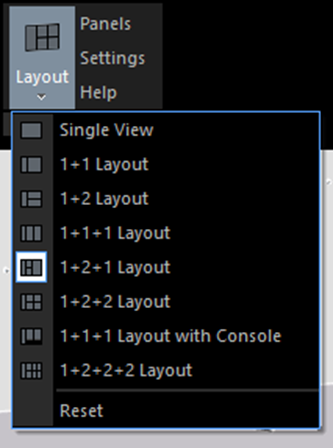
I like to use 1+2+1 to see my build tree and settings, a close-up photo, all the photos, and the 3D model. But it can also be useful to see the console for error messages and the like. Really, this is personal preference, but being able to see all photo thumbnails and a close-up will be useful for placing control points (see below).
If you click the settings button, next to the layout button, you’ll see the settings appear in the lower left:
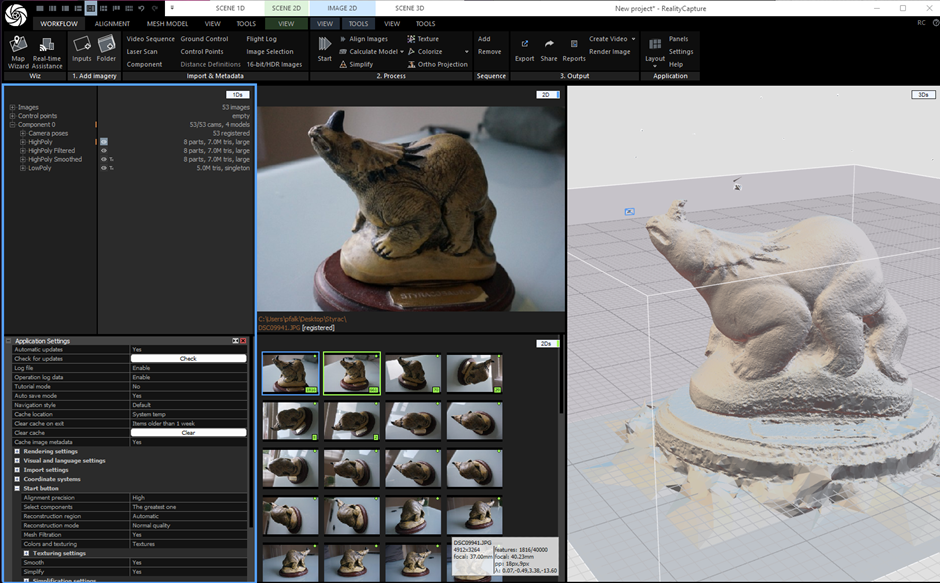
There’s lots of options in here, so let me run through some of the ones I use:
Check for updates – (obvious, but worth a click now and again.)
Rendering settings – you can tweak these if your computer is struggling/overpowered, but I’ve never had need to.
Start button – this is where you can tell it to either select the largest component, or use all, if the photos don’t align into a single mode. You can also change the quality of the alignment, whether it filters and textures, and under Simplification settings, whether it simplifies, when you just hit start. I find that I like to keep decimation and filtering for doing by hand, so I tend to set ‘Mesh Filtration,’ ‘smooth,’ and ‘simplify’ to off. That means your first reconstruction after hitting ‘Start’ arrives much quicker, and you can then decide whether you want it to be filtered, smoothed, or decimated.
I tend not to change any other settings, but you may want to look around in there. If you hover your mouse pointer over the setting, it will explain what it does.
Running the process manually
To align, mesh, and texture manually at each stage, you follow the tabs along the top. After dragging your photos into the application window, go to ‘Alignment’ and press ‘Align images’:

Then open the next tab, ‘Mesh Model’ and click either ‘Preview,’ ‘Normal Detail,’ or ‘High Detail.’ :

It’s tempting to want to click high detail, but there’s a reason Normal detail is so much more prominent. ‘High Detail’ tends to introduce a lot of noise, and a lot more polygons, for no real benefit, at least from my experience, but your milage may vary.
Once you’ve got your mesh, you can either click ‘colorize’ which will colour the vertices, or ‘texture’, which, well, textures the mesh. ‘Settings’ in this panel (next to the texture button) will open the texturing settings:
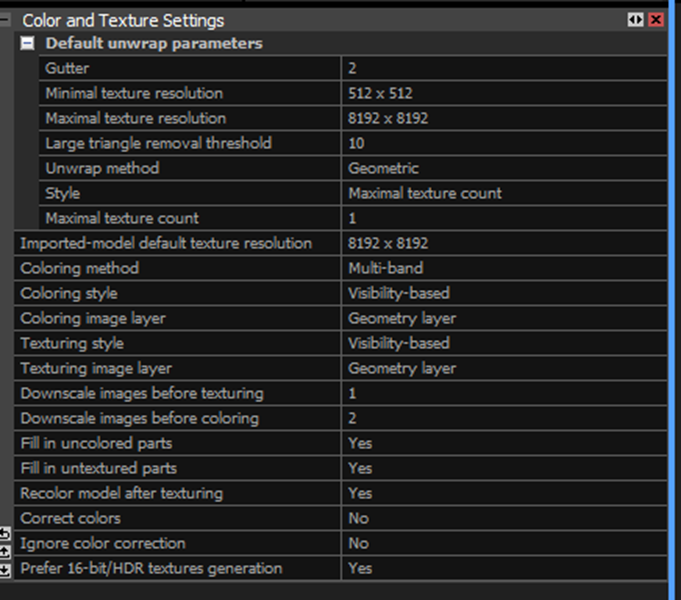
You are also able to just unwrap the model (this may be useful later)
Scaling your model
This is the main reason I moved over to Reality Capture fully – it’s the only photogrammetry software I’m aware of where this functionality is built into the GUI and available for free.
My test dataset doesn’t have a scale bar, but let’s pretend the brass name plate is 4 cm long.
Go to the Alignment tab, and ‘add control points’:

This is a bit finicky, because Reality Capture likes to auto advance to a new control point each time, so you have to remember to go back and click the one you want, but the process goes like this:
Open an image, and click at one end of your scale bar, then click at the other end.
Now click on a different thumbnail, where 1 or both points are visible, and do the same again, remembering to select the control point you want this time from the tree on the left.
After doing two photos, it’ll find that same point elsewhere, and you can click those photos in the tree, check it’s in the right place, and click the add button. If it’s not in the right place, you can click and drag.
Here’s that in action:
Now we need to define that distance. In the tree on the left, under control points, is an entry ‘create distance’:
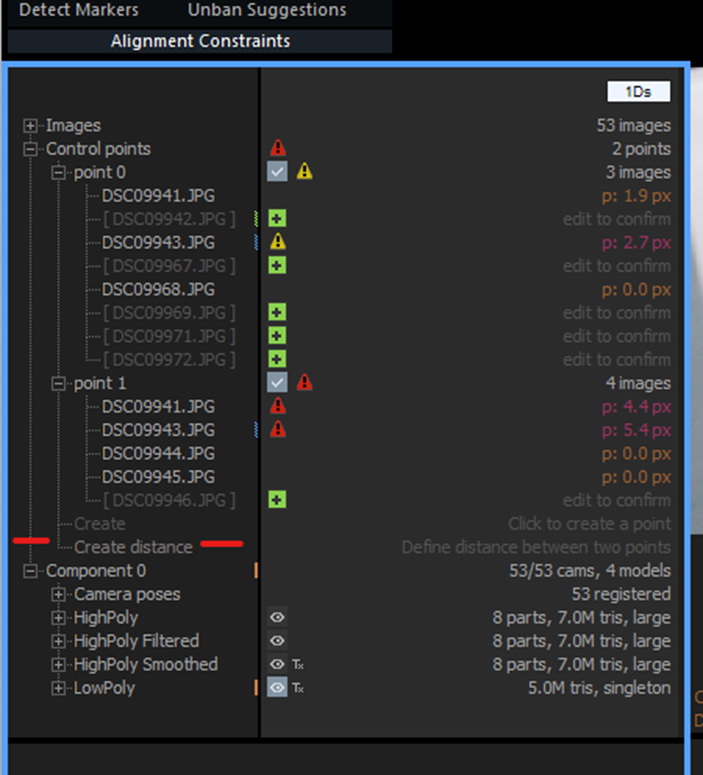
Click on that, and you’ll be given a small menu where you can set point a, point b, and defined distance:
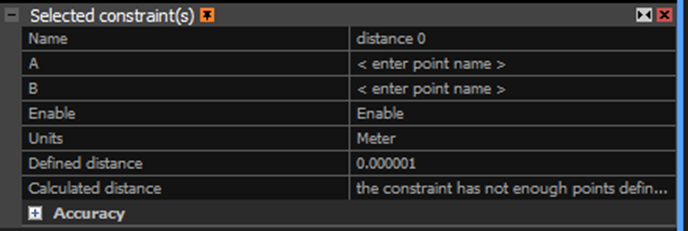
In our case, we want to set point 0 and point 1 as A and B, and set the defined distance to, in this case, 0.04 (4 cm).
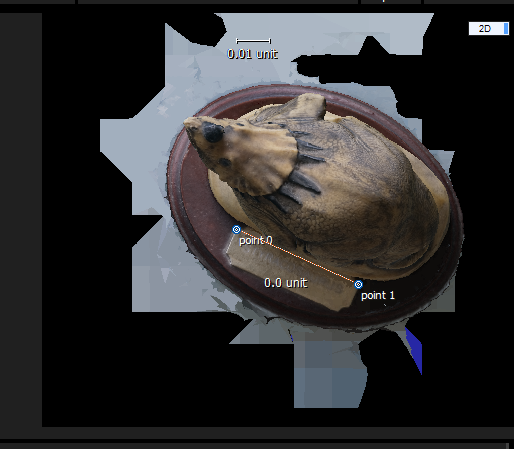
Now, it’ll look like nothings happened, and the ‘calculated distance’ will be arbitrary and wrong:
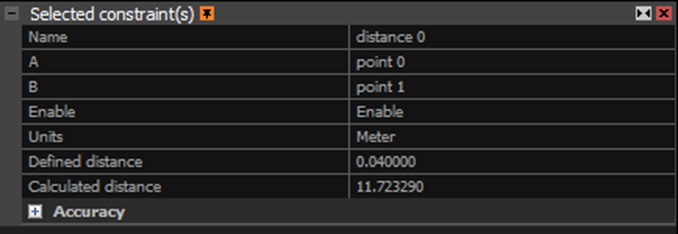
That’s because we need to update our alignment. Go back to the ‘Alignment’ tab, and hit ‘update’:

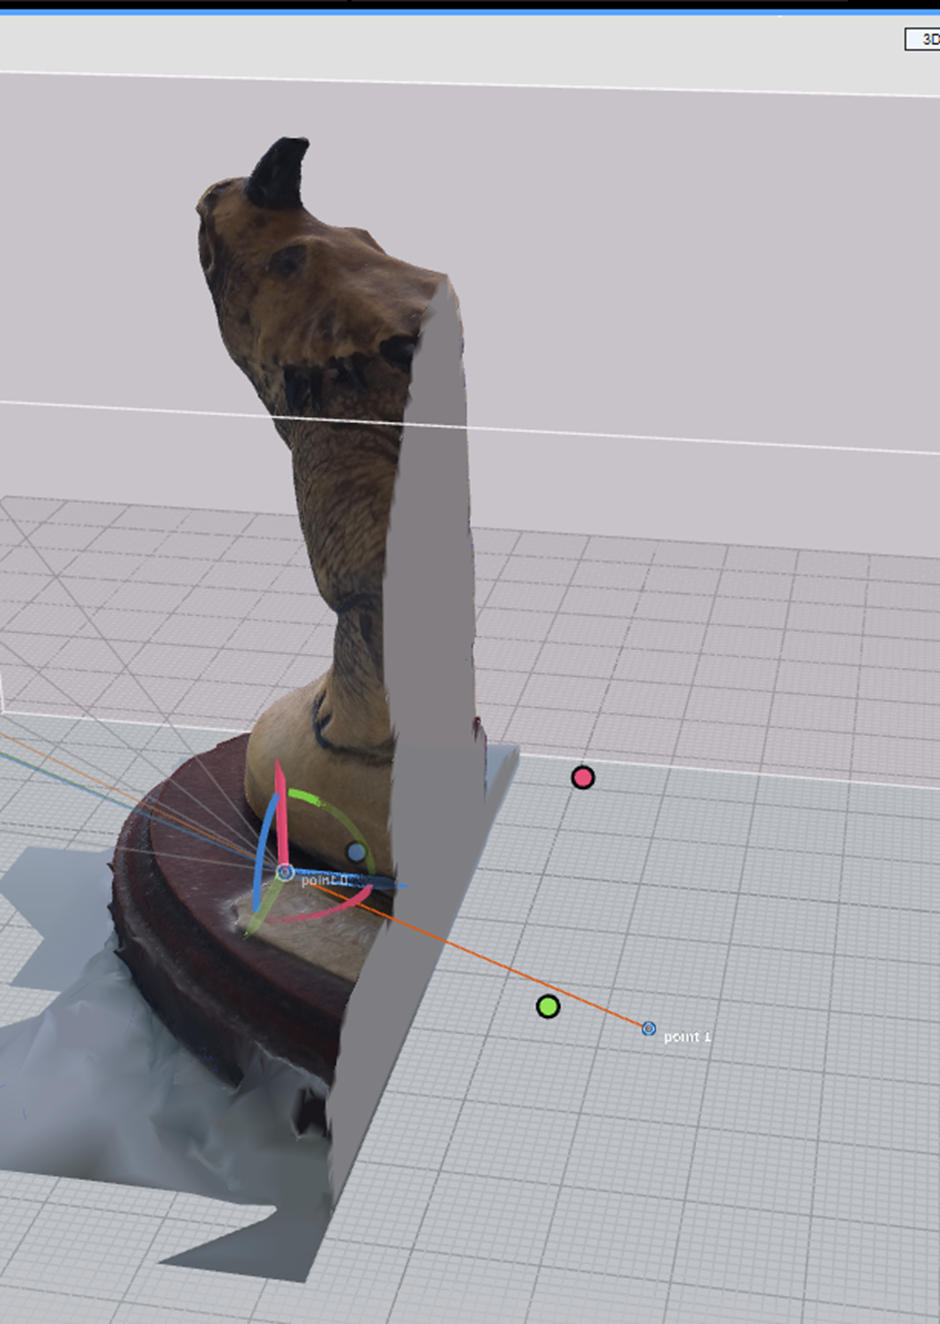
Your measured distance and calculated distance should now be the same, and your model should now be accurately scaled. When you export, you’ll be able to take measurements in real units in whatever software you use. Obviously the accuracy of your scaling depends on how accurately you placed your control points, and in how many photos – the more the better. You’ll see in my images above that there’s lots of red and yellow warning signs – these indicate that the reprojection error is too high for those points, so go back and manually change them. If you select the point in the tree, you can manually move it in the 2D view by clicking and dragging. The view will zoom in so you can place it perfect to the pixel:
You can also click in the 3D view to place control points, and it will add said control point to photos that can see that point.
Manually smoothing, filtering, cropping, and decimating
So let’s assume you’ve made a single high-res model and now it needs making fit for consumption elsewhere. Open the ‘Mesh Model’ Tab at the top:

Under the analyze tab, you’ve got tool for checking topology, closing holes, and cleaning the model.
Under the ‘Scene 3D tab’, and ‘tools’, there’s more (and duplicate) tools for simplifying, smoothing, closing holes etc.

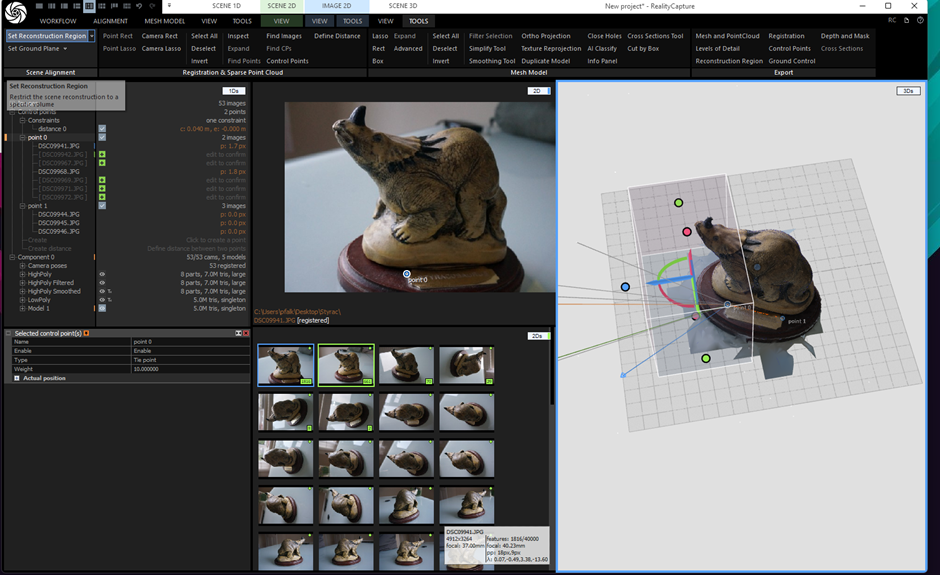
One of the tools I use most is ‘cut by box’ to just crop the model neatly. To do this, first you need to click ‘set reconstruction region’ on the left, and then adjust the box so that it’s where you want it:
Having done that, you can click ‘cut by box’ and select to delete mesh from either outside or inside the box. The advantage of doing this within reality capture is that it will remesh and make the crop clean:
Whilst we’re here, if you want to align the model to the ground plane, just hit ‘set ground plane’ and rotate the model using the gizmo until it’s where you want it. You’ll need to do this before generating an orthophoto.
Making an orthophoto or Ortho Projection
Simple really – assuming your model is aligned to the ground plane, just go back to the ‘workflow’ tab, and find ‘Ortho Projection’. Just hit ‘render’ to render out a nice orthophoto:
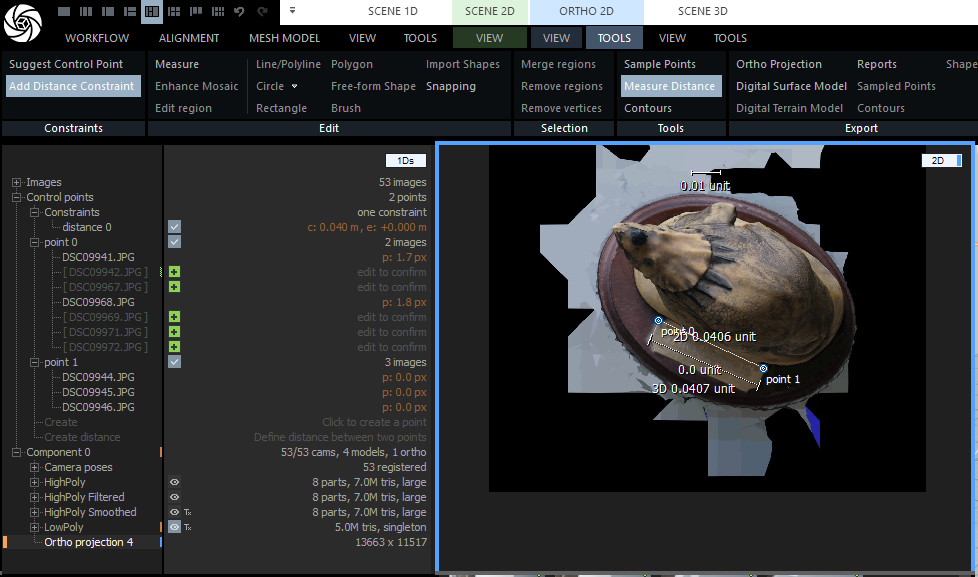
You select the face you want to project from in the 3D viewport. It picks top-down by default (z axis)
The distance is reported in units, and because it’s only to 1 decimall place, we’re not seeing the 0.04, but if I use the measure distance tool under the new ‘Ortho 2D’ tab, it reports correctly:
Closing remarks
Metashape has long been a staple of many of these people’s workflow. It’s easy to use, produces great results, and most importantly runs on a much wider range of hardware than almost any other free or commercial photogrammetry software, primarily due to it’s lack of reliance on Nvidia GPUS. But, it’s always had features like scaling behind a paywall, and with new bans in the US, is no longer available to government workers/agencies over there. Reality Capture is fast and powerful, and has a learning curve that gets you in there fast, but offers lots of room to learn.
I’ll end with a quick comment on the open-source options: In the Open Source space, I’d say AliceVision Meshroom (including Meshroom-CL) is the most-complete package in the free space. It’s not as fast as COLMAP, but it does go all the way from photos to textured mesh. I’ve had some issues with making textures clean and simple, and it does tend to create a large amount of intermediate data that needs cleaning up after. COLMAP is very much the go-to for researchers in photogrammetry and similar technologies, but while it’s fast and accurate, it’s not a complete pipeline, and whilst it has some basic meshing features built in, the pale in comparison to what’s available elsewhere.

Leave a comment