A lot of the photogrammetry models I make, and that I generally see online are of decent sized objects, or even large buildings and terrains. But as long as you can take a decent photo of something, you can digitize it.
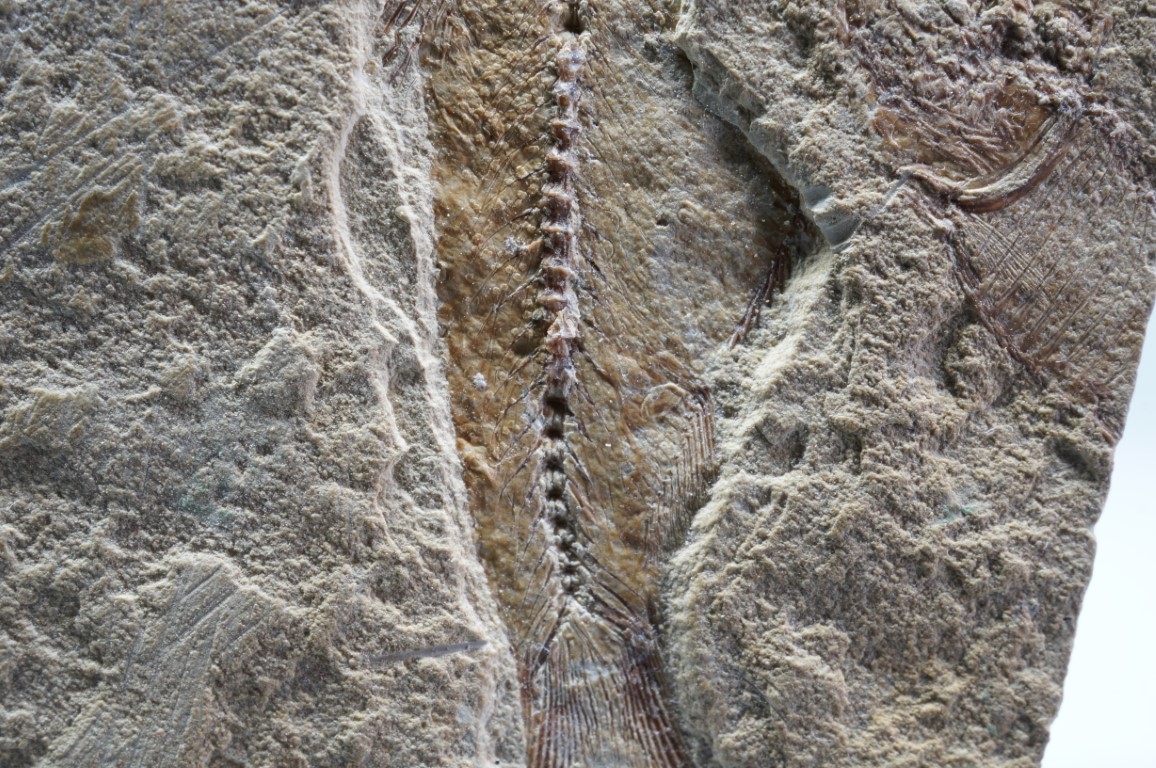
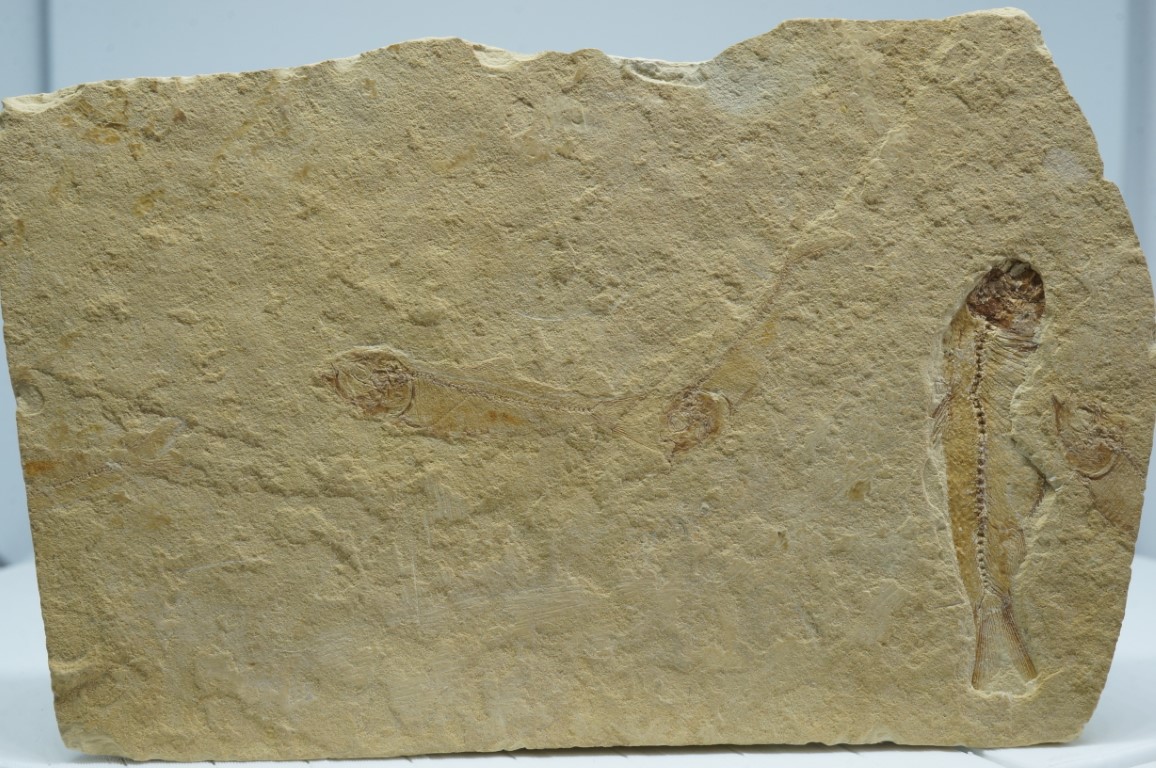
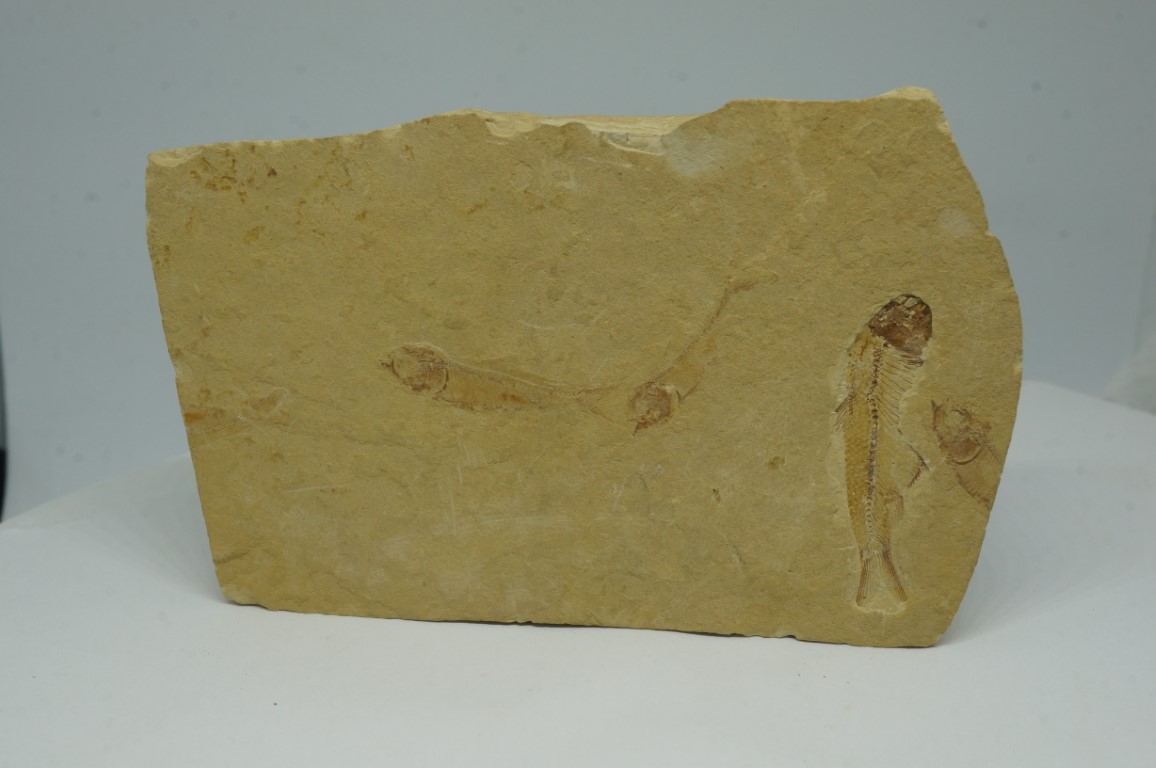
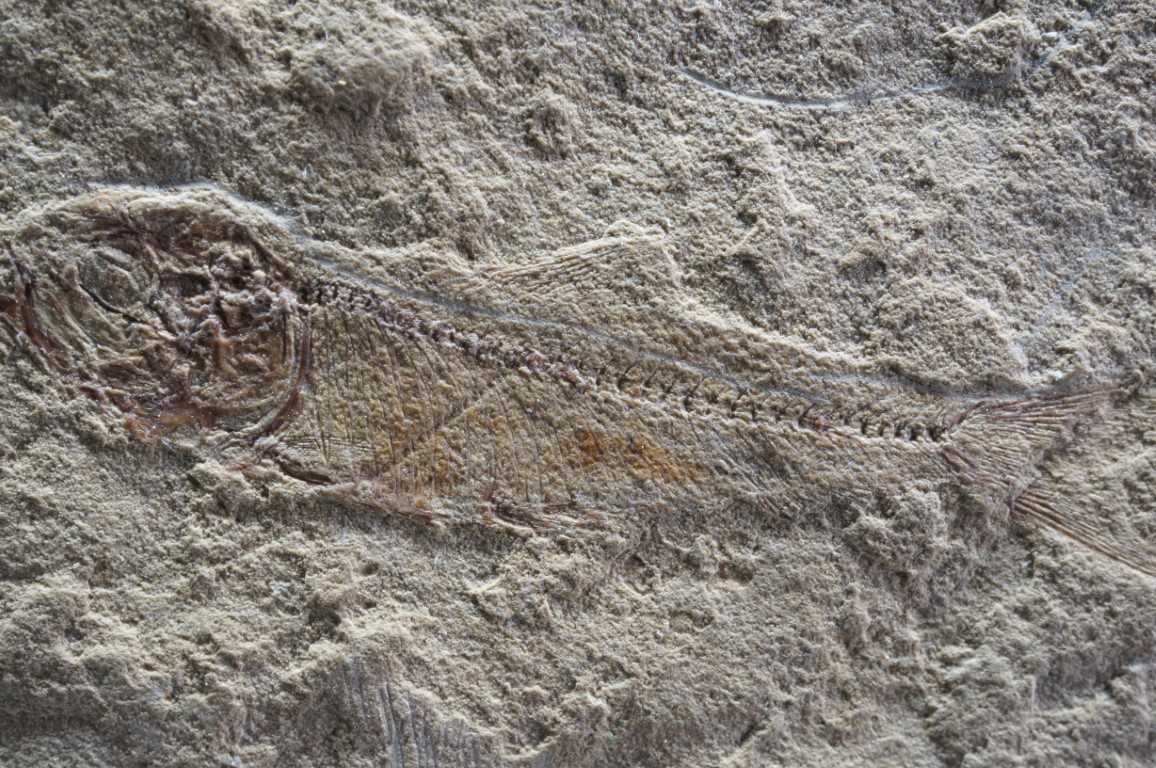
A while ago I tweeted some nice Macro images of a fossil fish specimen from my collection, testing out a Macro lens I’d bought myself.
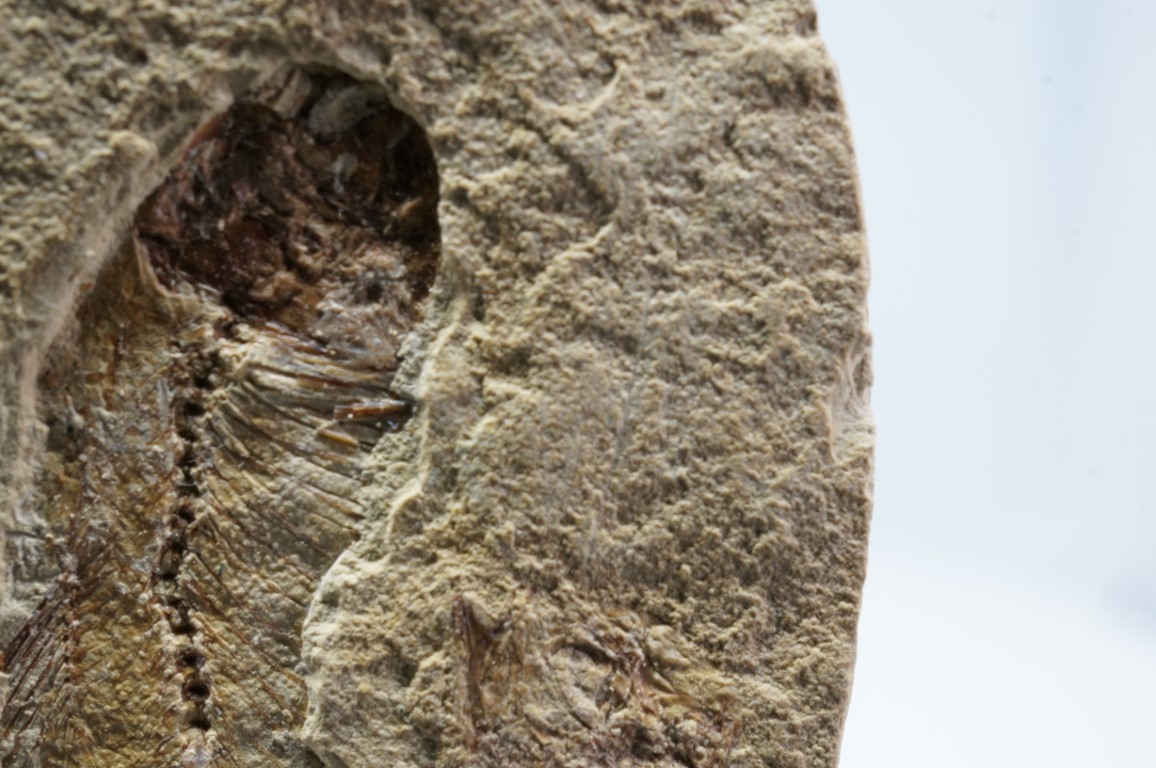
To give you an idea of the scale of these things:

I made a model of it shortly after:
So here I just wanted to talk about what went into it.
The model was made with 200 photos. Here’s some samples of the photos from the full set of 200:


I’ve made the entire photo-set available [temporarily] here.
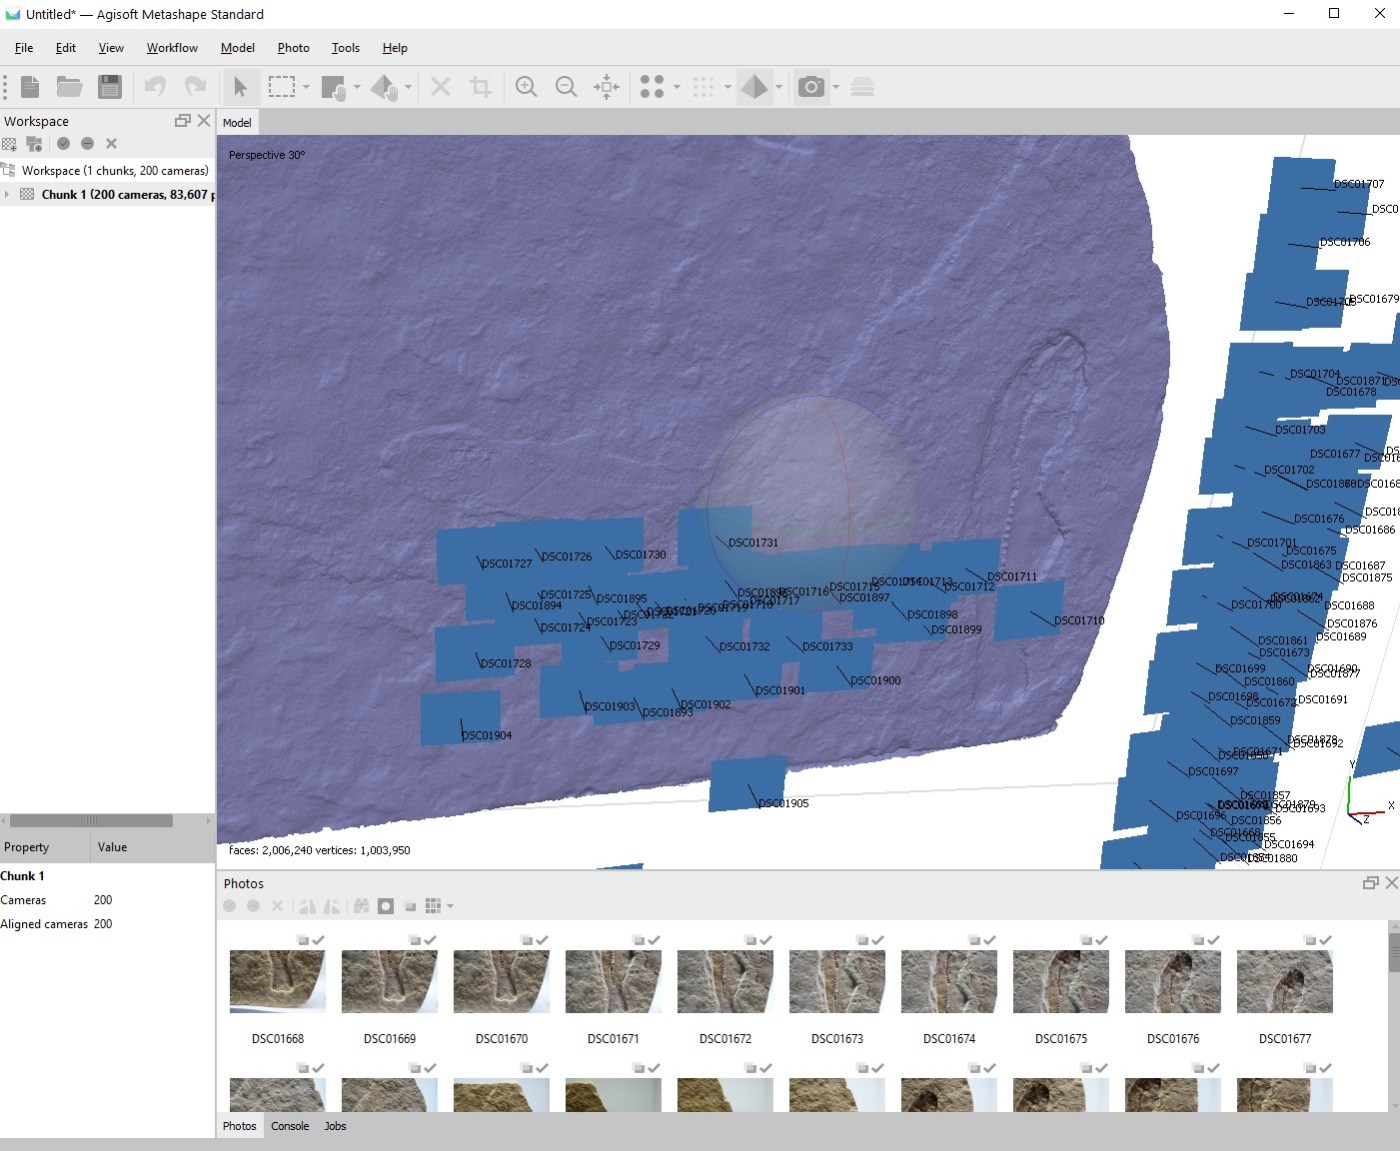
To show you how they were taken, take a look at this reconstruction in Agisoft Metashape:
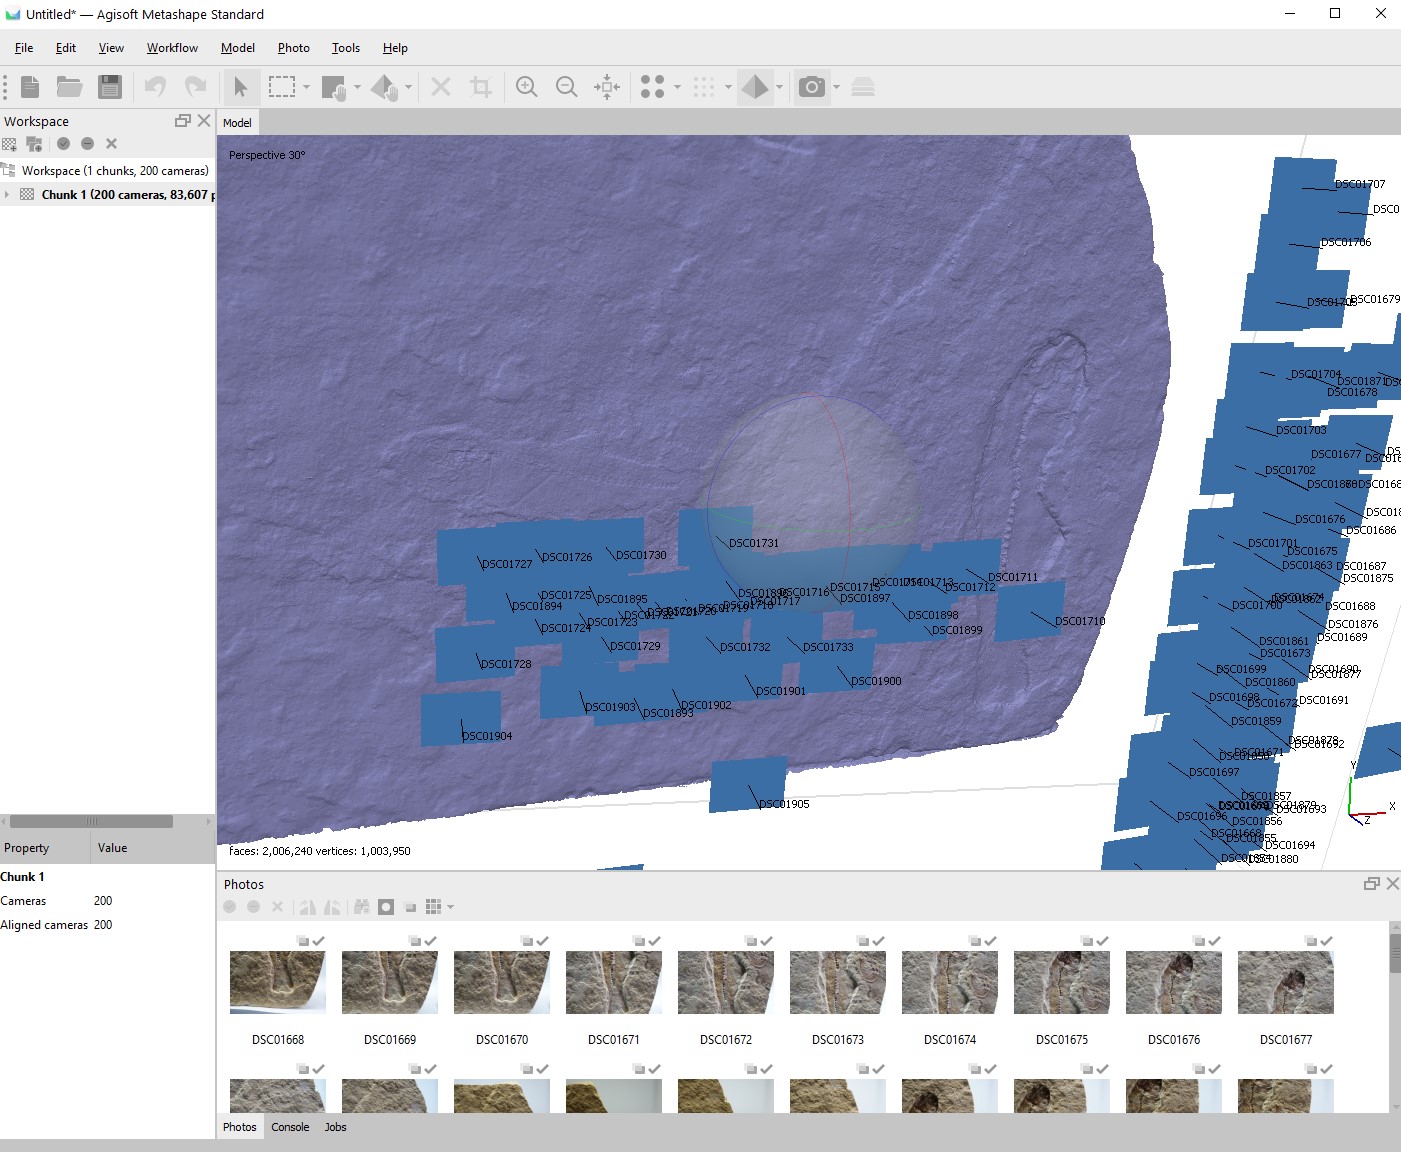
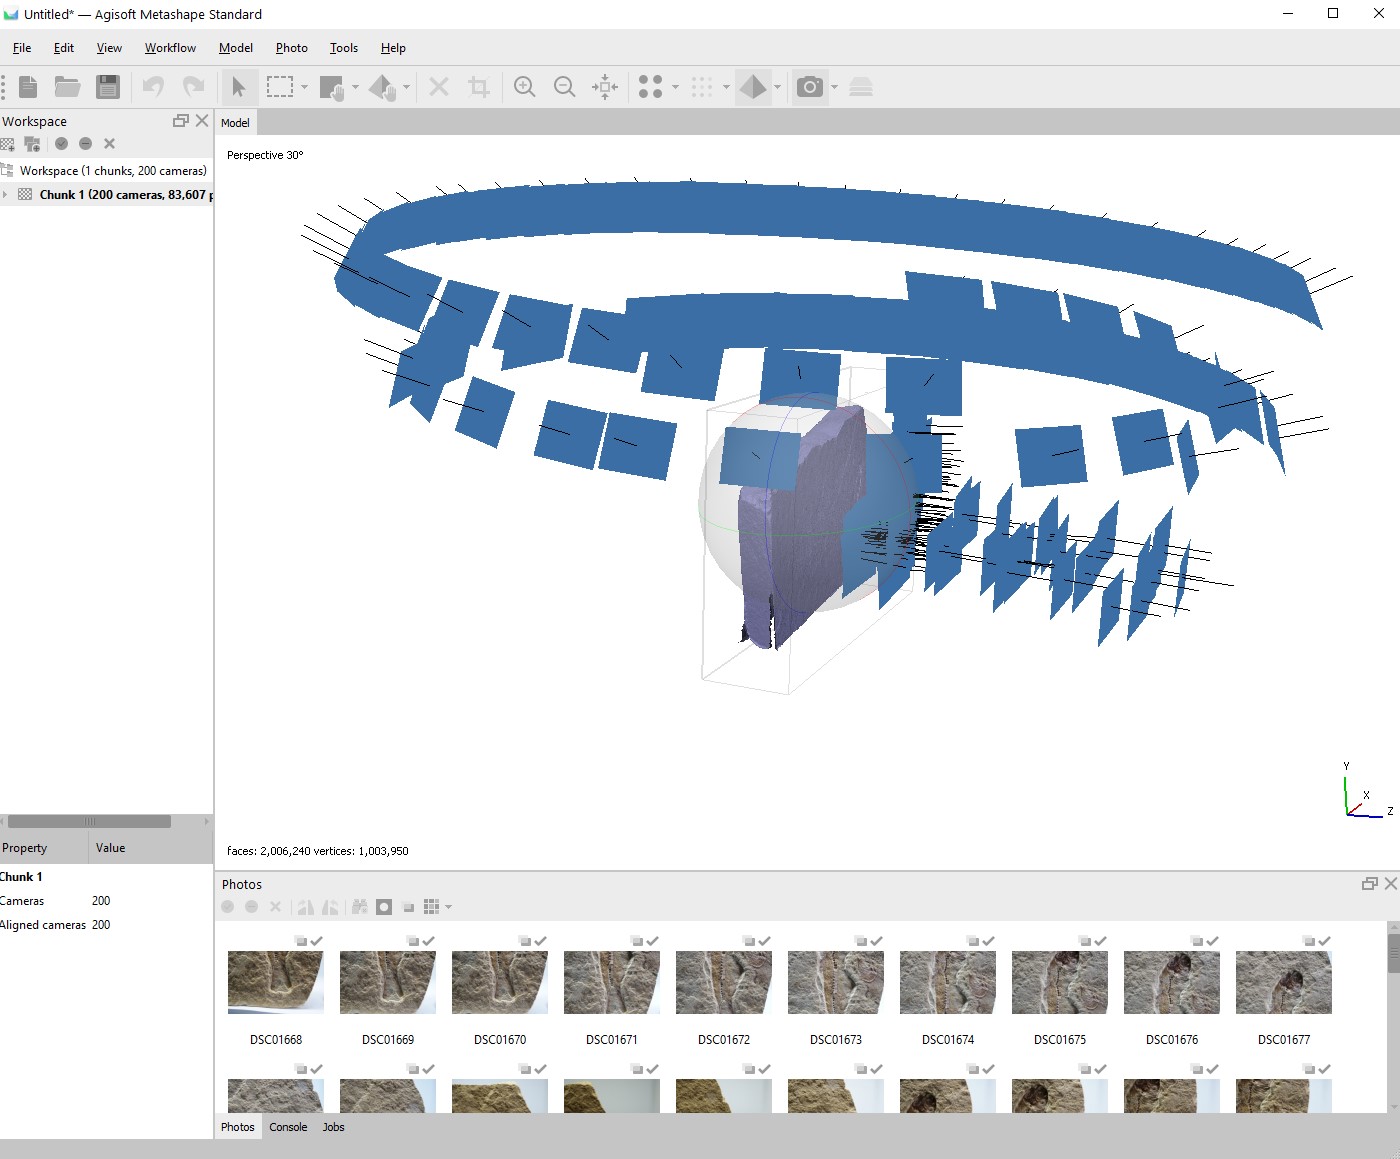
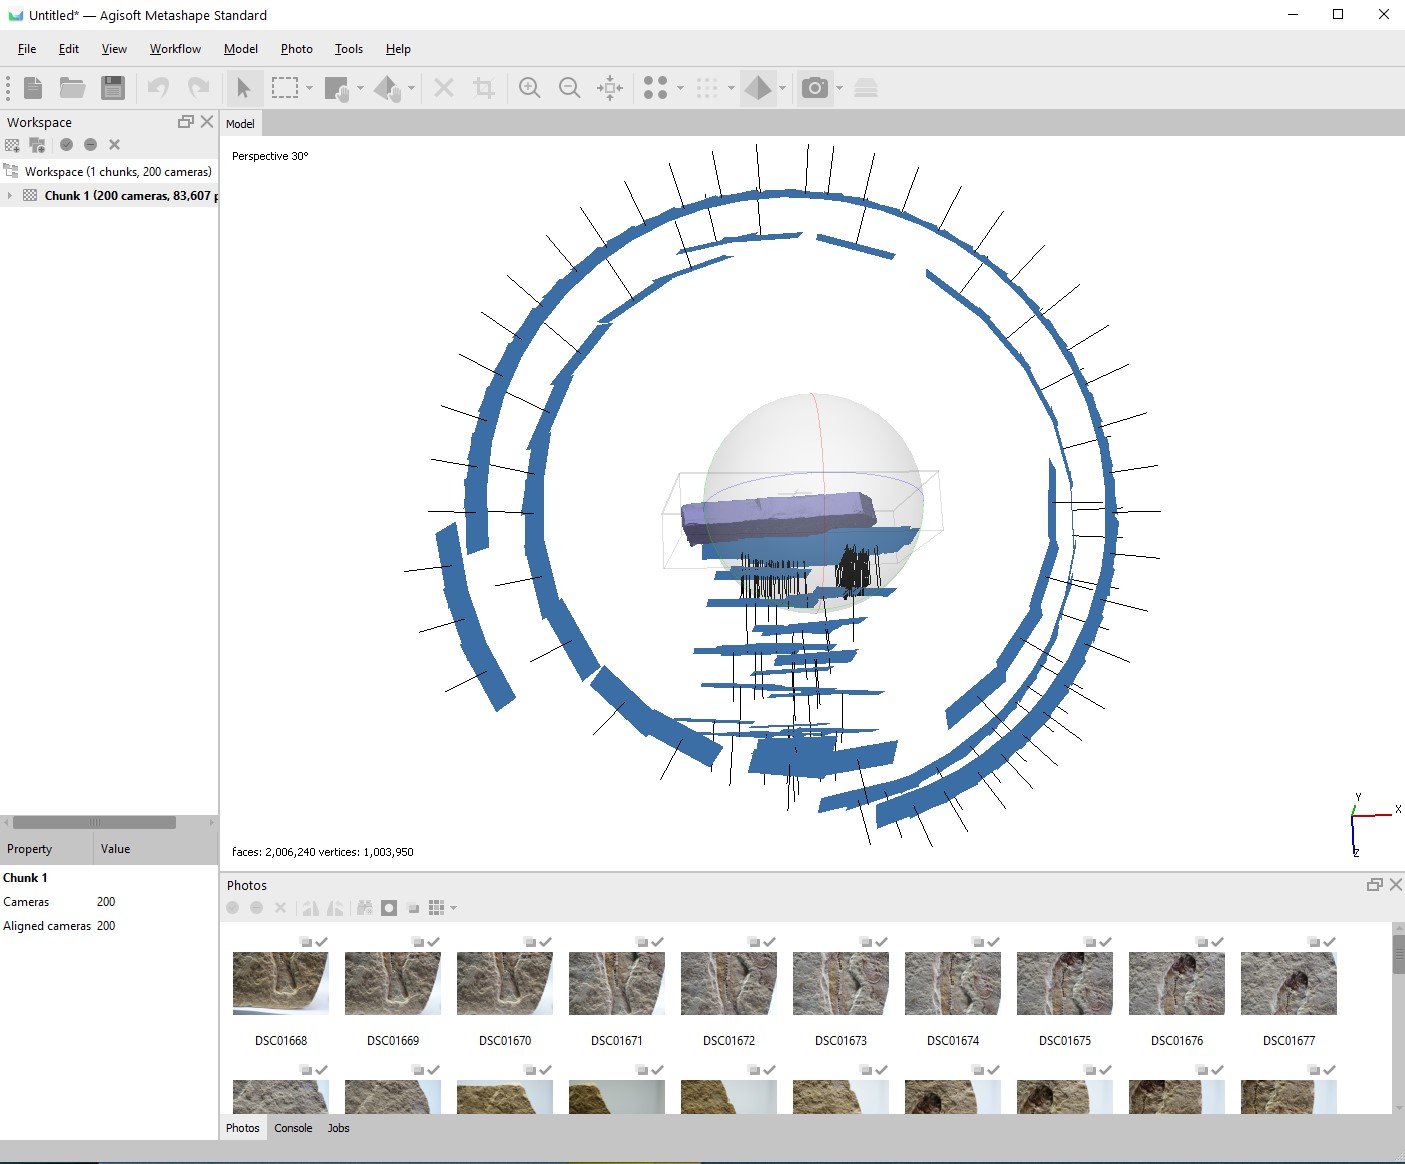
You can see I’ve made two circular passes, then gone in close – right up to the fossil (the macro lens I was using lets you focus with the lens basically touching the object).
I will note here that Meshroom and Reality Capture fail to get the whole specimen, and only reconstruct the close-up areas, hence why the video in my tweet above has all the white guff around it. However, I re-made the model recently in Metashape and it absolutely nailed the whole thing.
Anyway, the model is now available on Sketchfab, where you can see the quality of the reconstruction. Keep in mind that scale bar in the first image in this post:
There’s almost no topography at all. Taking the model and colouring it according to height in Cloud Compare, we get this, where blue-red is 0.5mm:
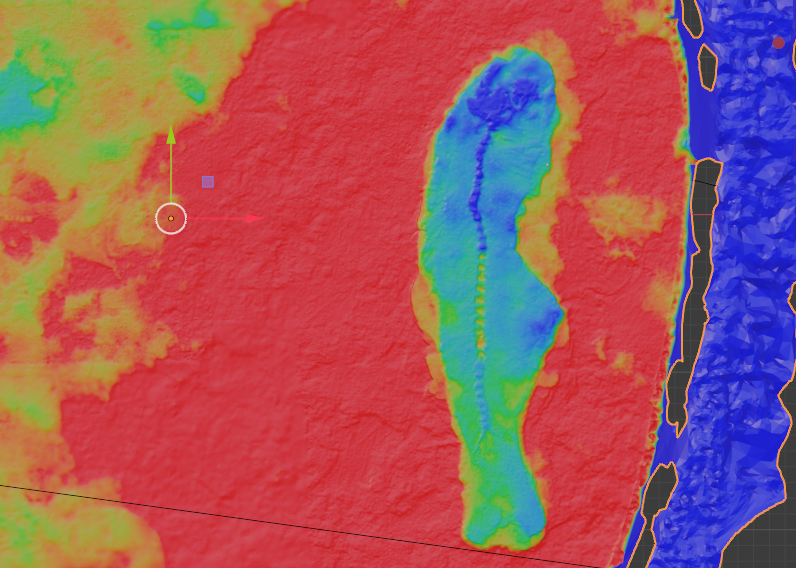
So yeah, the level of detail attainable is pretty incredible.
[edit] Some time after writing this post, I made this animation in Blender of the model above:
https://platform.twitter.com/widgets.jsNew render in #b3d of this tiny fossil fish, trying to really convey scale (and level of detail) pic.twitter.com/91jPdom6Sz
— Peter Falkingham (@peterfalkingham) June 2, 2021

Very cool. Most macro shots I have done are for fun, flowers/birds etc.) I usually shoot wide open (about F4 on a 105 mm macro lens). However, I would think you would want to narrow the aperture considerably (F/14ish)?? To be honest I had not thought of using a macro lens for photogrammetry, but think it would be good to try. I see from your figure that you used a series of overlapping nadir positions for the places where the camera was near the sample. I assume the encircling shots were just to have the full sample piece on all sides in the model?? Just curious, did you set a specific aperture, low ISO, use a tripod and shoot in aperture priority. I might give it a go at DSP for some very small casts of a hopping trace. I’d likely use low-angle light the sample, although it is quite awkward to position a camera near the sample. Is 105 too long a lens in your opinion?? This relates to a slab I modelled a while back for collaboration with Paul O. Am working with some others too. Here is the sketchfab link to those models:
Otozoum Slab and Slider Rock by hyattj on Sketchfab
Great website – loved the slow-mo videos!
James (aka Drew) Hyatt
P.S. Thanks again for the very helpful review on the DSP book paper a while back; really improved the ms.
Hi Drew. Yes, closed that aperture as much as I could (14ish), and shot in aperture priority, used a tripod, and got plenty of light in there. The outer ring of photos were specifically just to get the overall object.
I don’t see any reason a 105 lens would be too long – focal length doesn’t make too much difference, especially if all the metadata is in the image.